Launching the Rocket
Follow the simple step by step instructions below.
Choose a wide-open grassy field away from buildings, trees, cars, roads, airplanes, wires, and crowds. Bring along one or two plastic 2-litre bottles or a gallon milk jug full of water to supply your rockets. Don't use any soap in the water for foaming: the foam will cling to the inside walls of the spinning bottle and not come out during the flight. This can cause the top stage to fall straight down instead of sideways, which may damage some of the rocket parts. Use a collapsible shopping basket or bag to carry the rocket and water supply. Pour the water directly from your supply bottle or jug into the rocket bottle. The bottom bottle should be about 1/3 full, or if you are launching a single stage then about 1/2 full. All the upper stages should have only about 1 inch to 1.25 inches of water in them (about 200 ml). When pouring water into the lower stages of a multi-stage rocket, you should keep a finger over the interstage nipple so it doesn't leak water out. If you are running your rocket with no water (it's much quicker, but doesn't fly as high), you can go directly to Final Assembly Step.
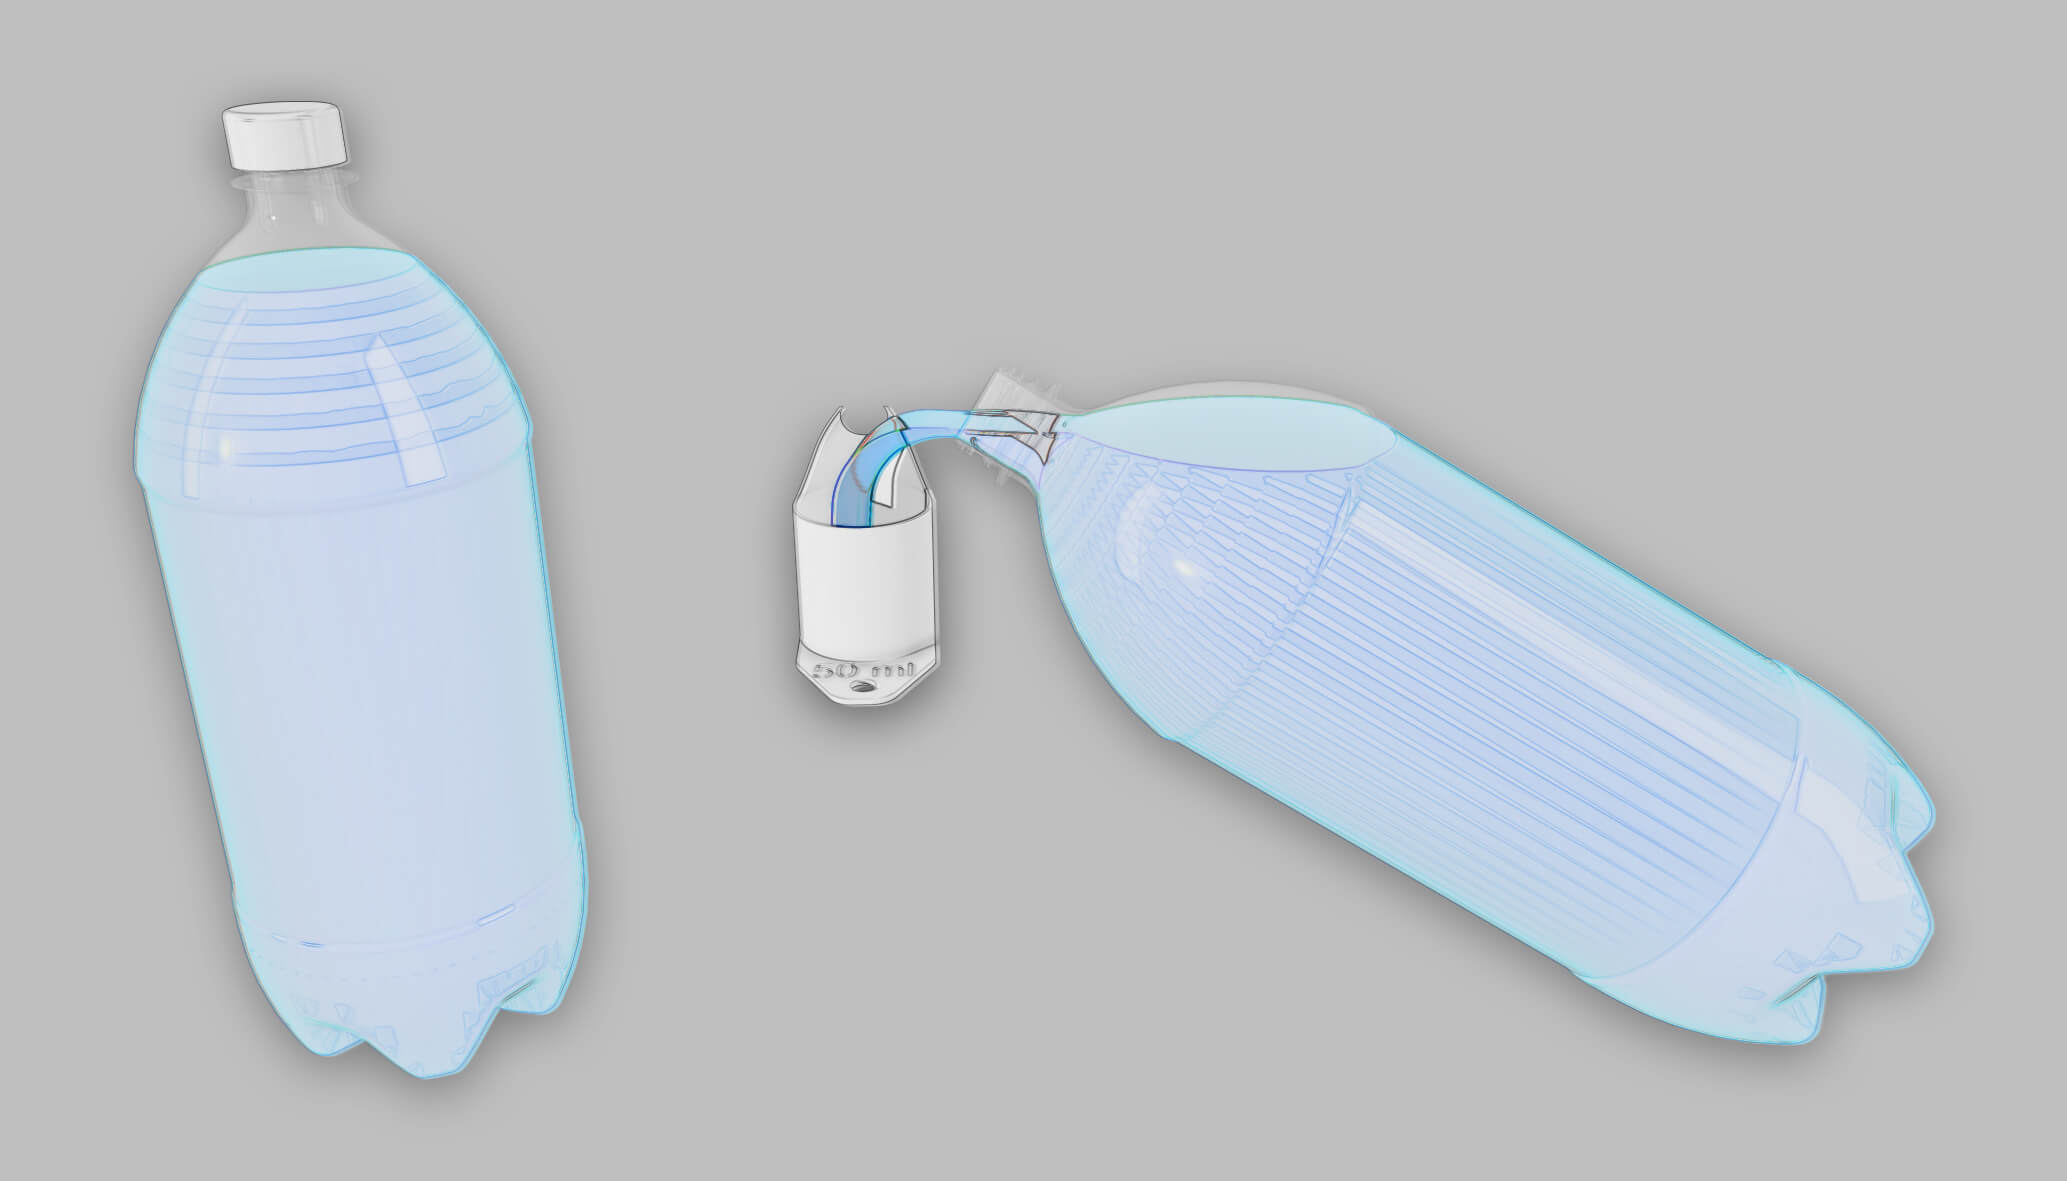
For each stage, one at a time, disconnect the nozzle/ring fin assembly and pour in 50 ml of water. Then put the stage back together. Don't tighten it too much.
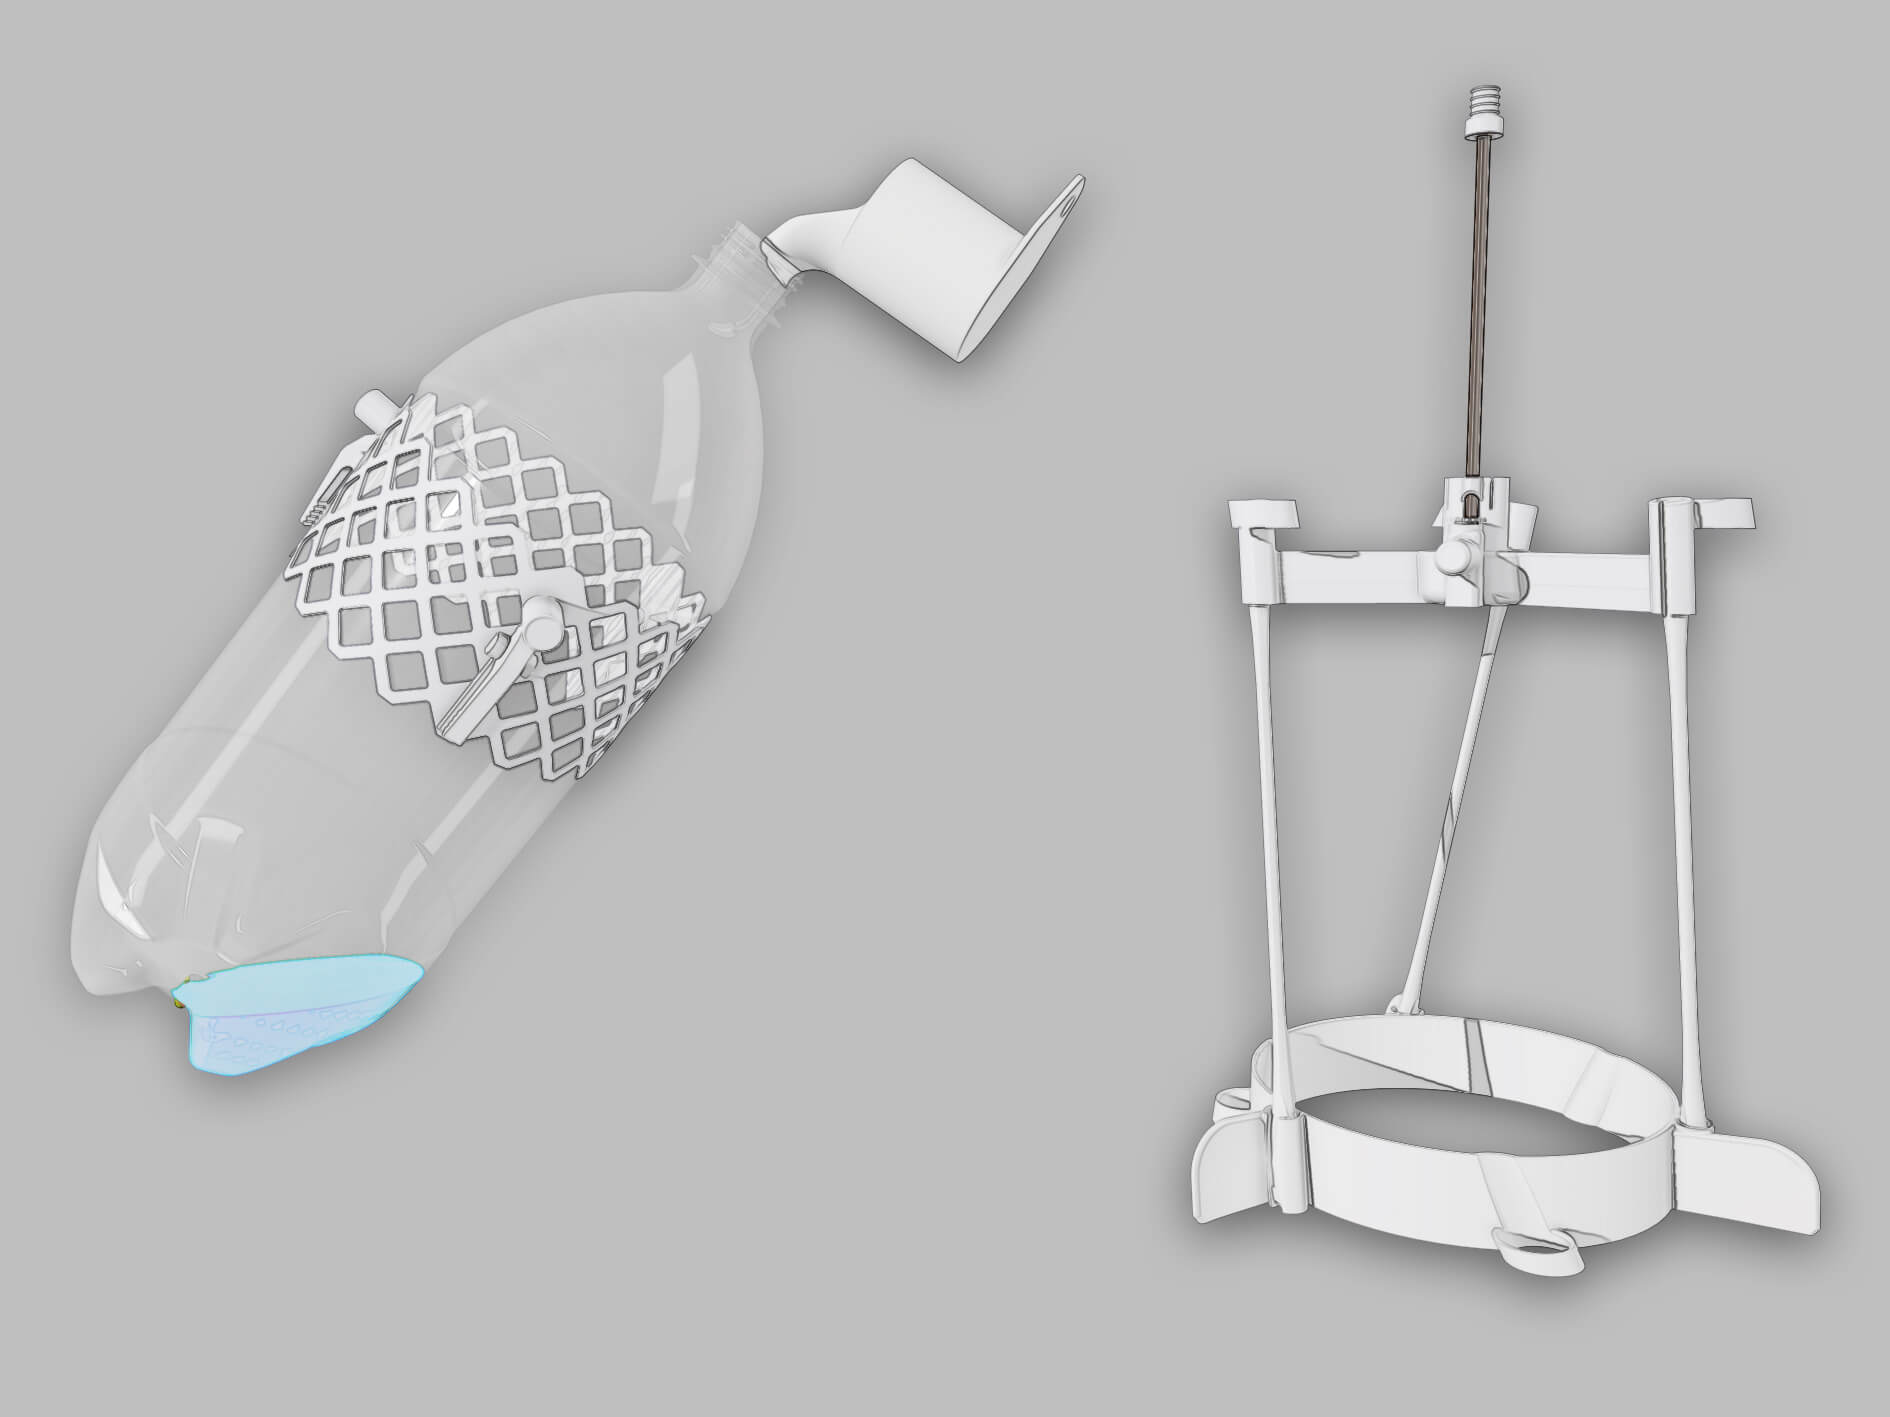
Final Assembly Step
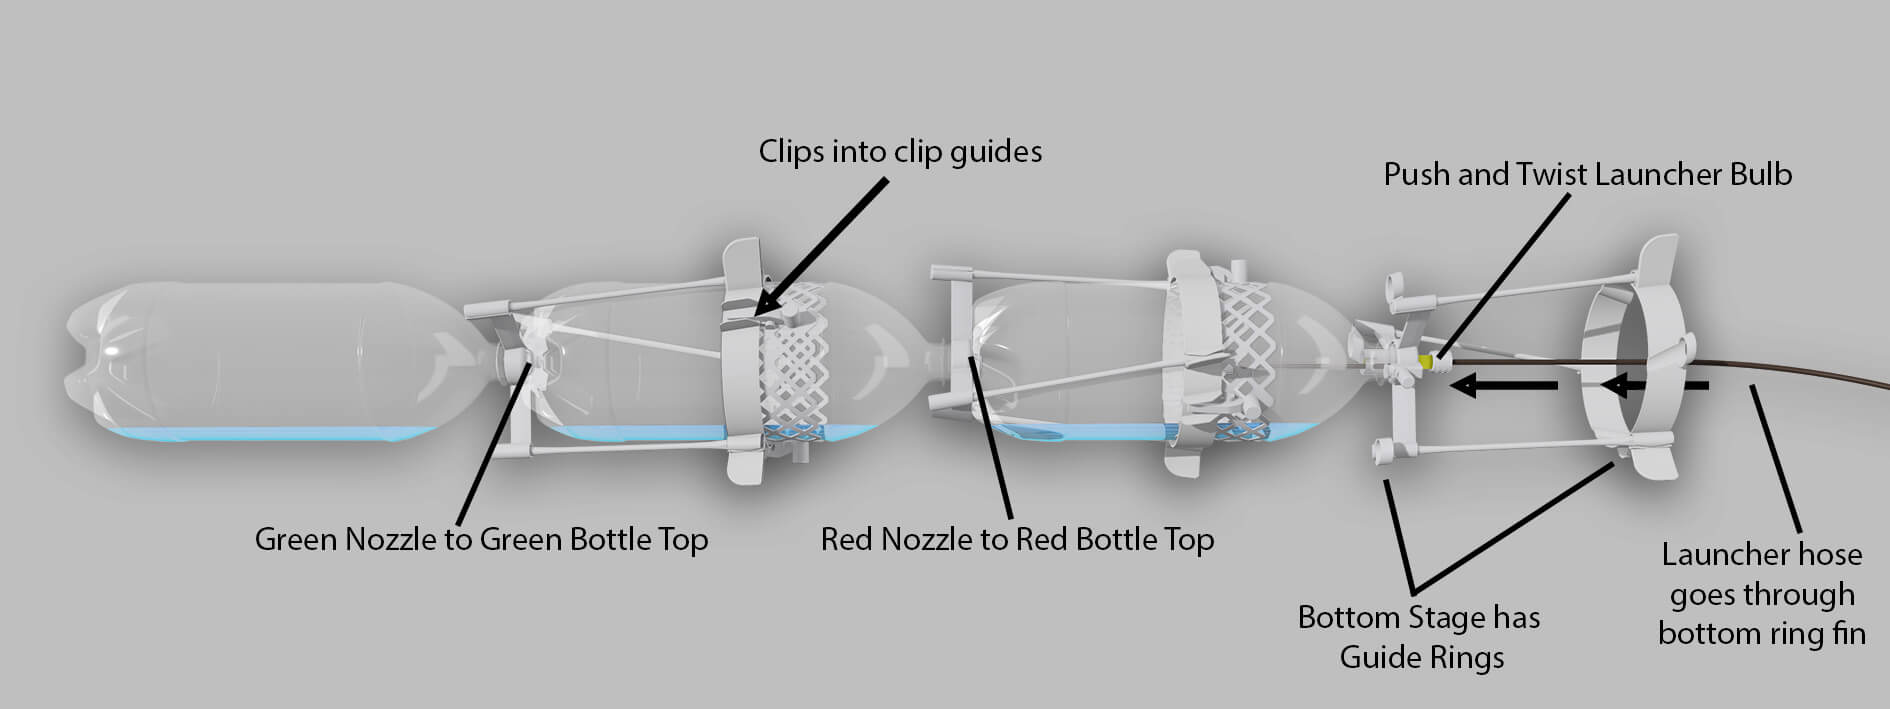
Assemble the rocket on its side so the water doesn't run out. Even if you don't have water in the rocket, it's still easier to assemble on its side. Then put the launcher bulb through the bottom ring fin and push and twist it into the booster stage as far as it will go.
Loading Onto the Launch Pad
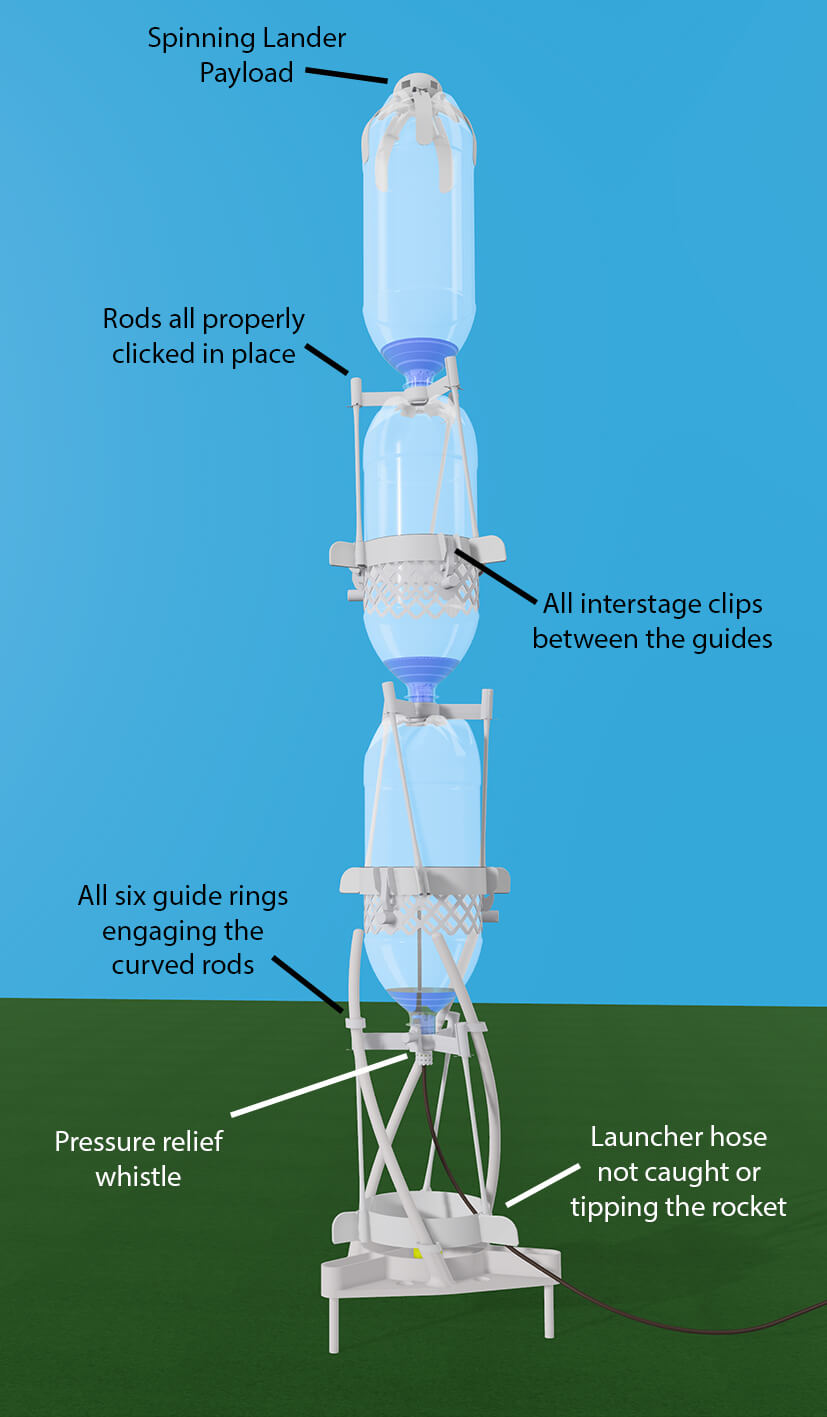
Carefully tip the rocket upright and slide the 3 bottom guide rings over the 3 curved guide rods. If the interstage release belt is interfering with the rocket sliding down the curved rods, you can twist the interstage belt around the bottle to a different position. Make sure that the rocket is standing up straight. Put the spinning lander payload on the very top of the rocket.
Before launching, go through this checklist:
- All the interstage clips are between the next stage's clip guides.
- All the posts connecting ring fin to nozzle are properly seated and clicked in place.
- The curved guide rods go through all three of the rocket's guide rings on the bottom ring fin.
- The launcher hose exits the launcher area under the bottom ring fin through one of the U-shaped holes at the bottom edge of the ring fin, so that it is not tipping the rocket at all.
Now the rocket is ready for pressurizing and launching!
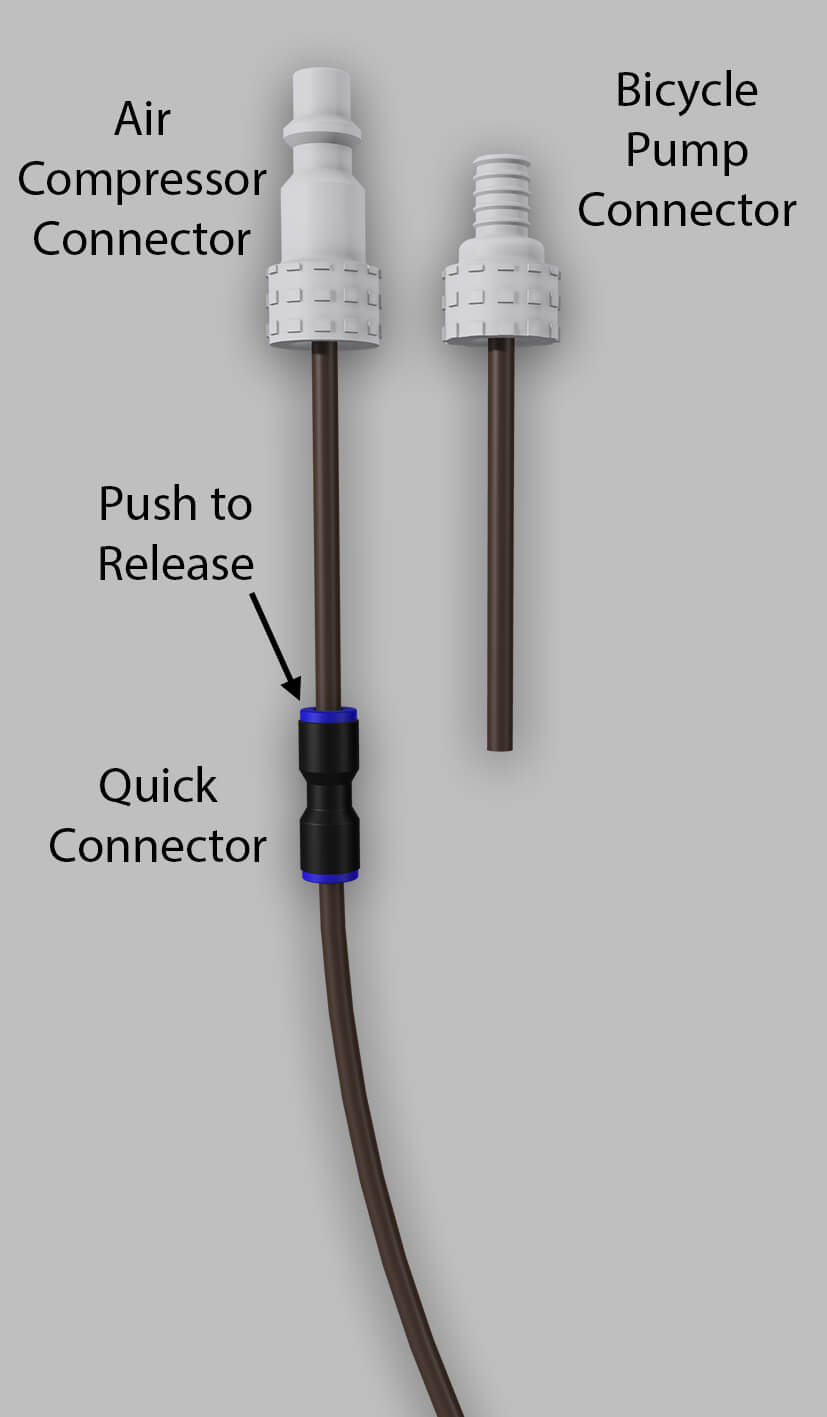
From 20 feet (6 meters) away from the rocket, connect the launcher hose to your bicycle pump or air compressor. Your kit includes two different connectors: one is for the air compressor, the other is for your bicycle pump. These connectors will either be on the launcher hose or in a clip on the reel for winding the launcher hose. Here's how to choose what type of bicycle pump or powered air compressor to use,
To change connectors, push in the release ring on the quick connector, and while you are holding the ring in the pushed position, gently pull out the short plastic hose and release the ring. Then push in the tube of the connector you want to use.
If you are using a powered air compressor, it should be capable of, and set for 120 PSI pressure. The pressure inside the rocket will only rise to about 30 PSI less than the input pressure. If you are using a bicycle pump, you will need to pump it about 200 strokes to pressurize the rocket.
Regardless of which type of pump you use, the rocket takes about 4 minutes to fill. The pressure relief valve will start whistling when the rocket pressure reaches the maximum allowable, about 90 PSI. Any pumping after you hear the whistle will not fill the rocket any further. So it is now time to launch.
At Last! Liftoff!
To launch the rocket, just disconnect the connector from your air compressor or bicycle pump. This decompresses the yellow launcher bulb and allows it to be pushed out of the booster stage nozzle.