Rocket Assembly Instructions
About AntiGravity's 4-, 3-, 2-, and 1-Stage Rockets
The World's most advanced pop bottle water rocket brings with it a full array of safety and enhanced flight features:
- audible overpressure relief valve
- surface-deformation interstage release mechanisms
- pressure controlled launch connection
- rocket driven spin stabilization
- built-in two-axis level indicator for ultra-vertical flight
- horizontal slow descent
- auto-rotating landing module
- versatile use as 4-, 3-, 2- or 1-stage rocket
If you would find an instructional video more helpful, here are the links to AntiGravity's rocket assembly videos.
Assembling the Booster Stage
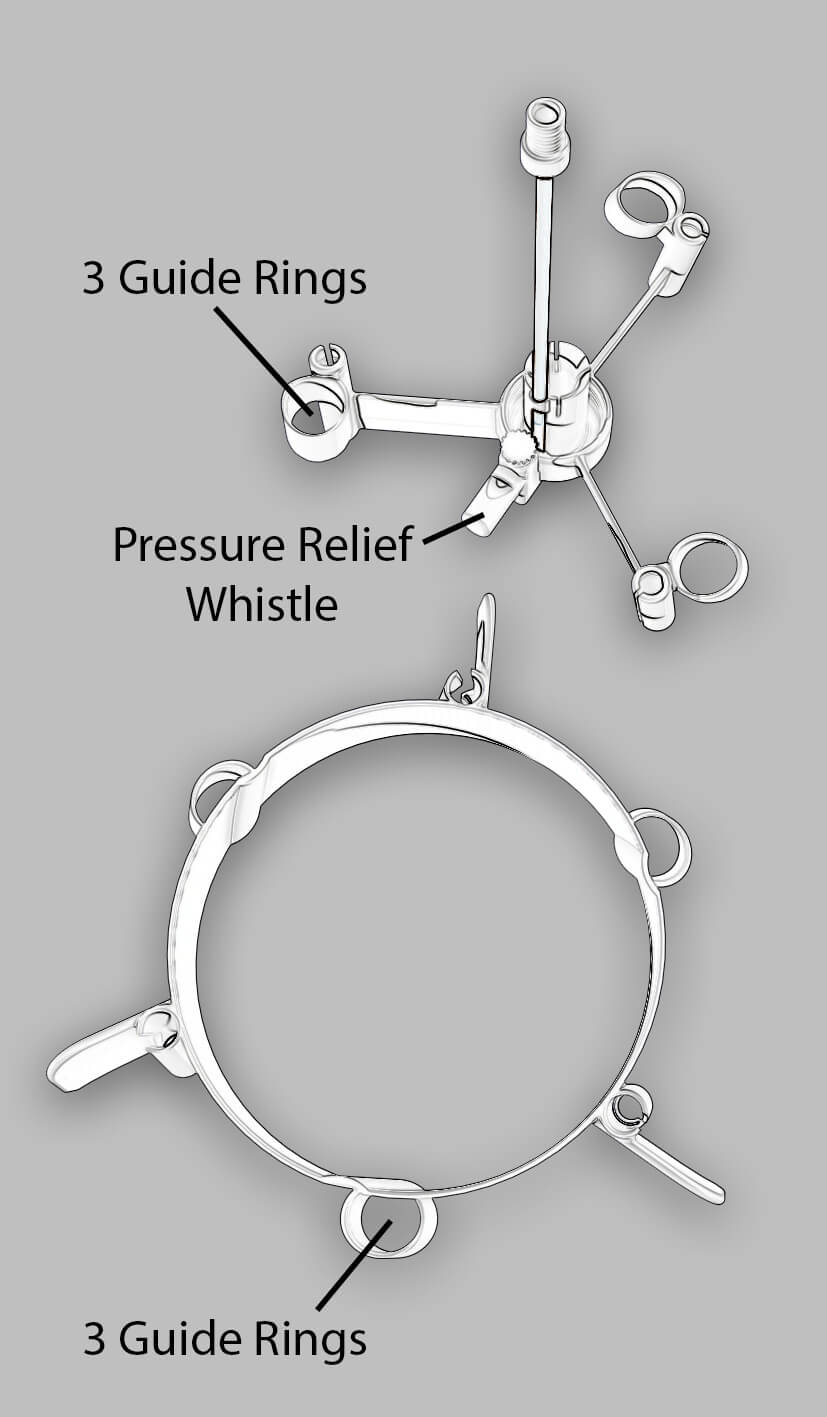
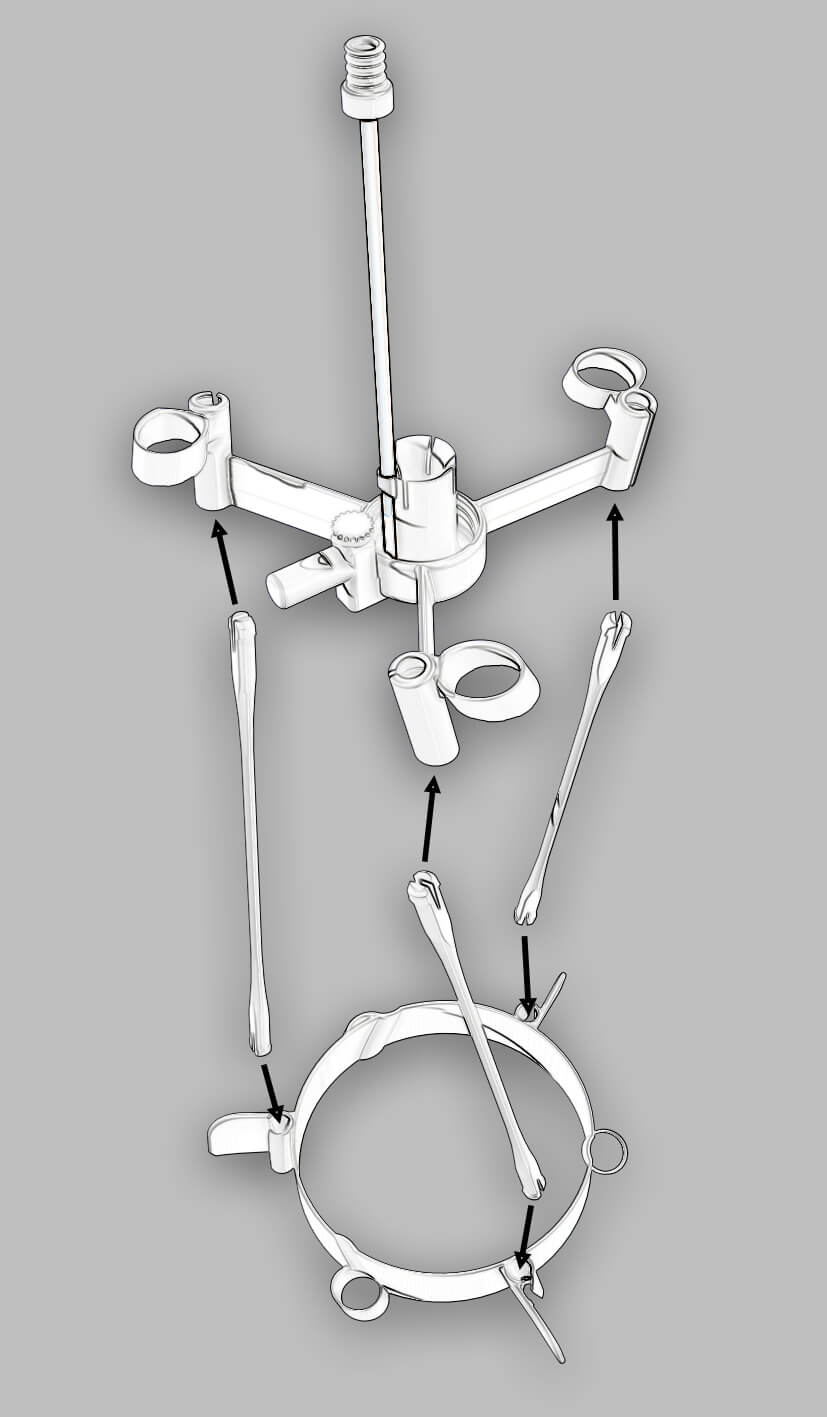
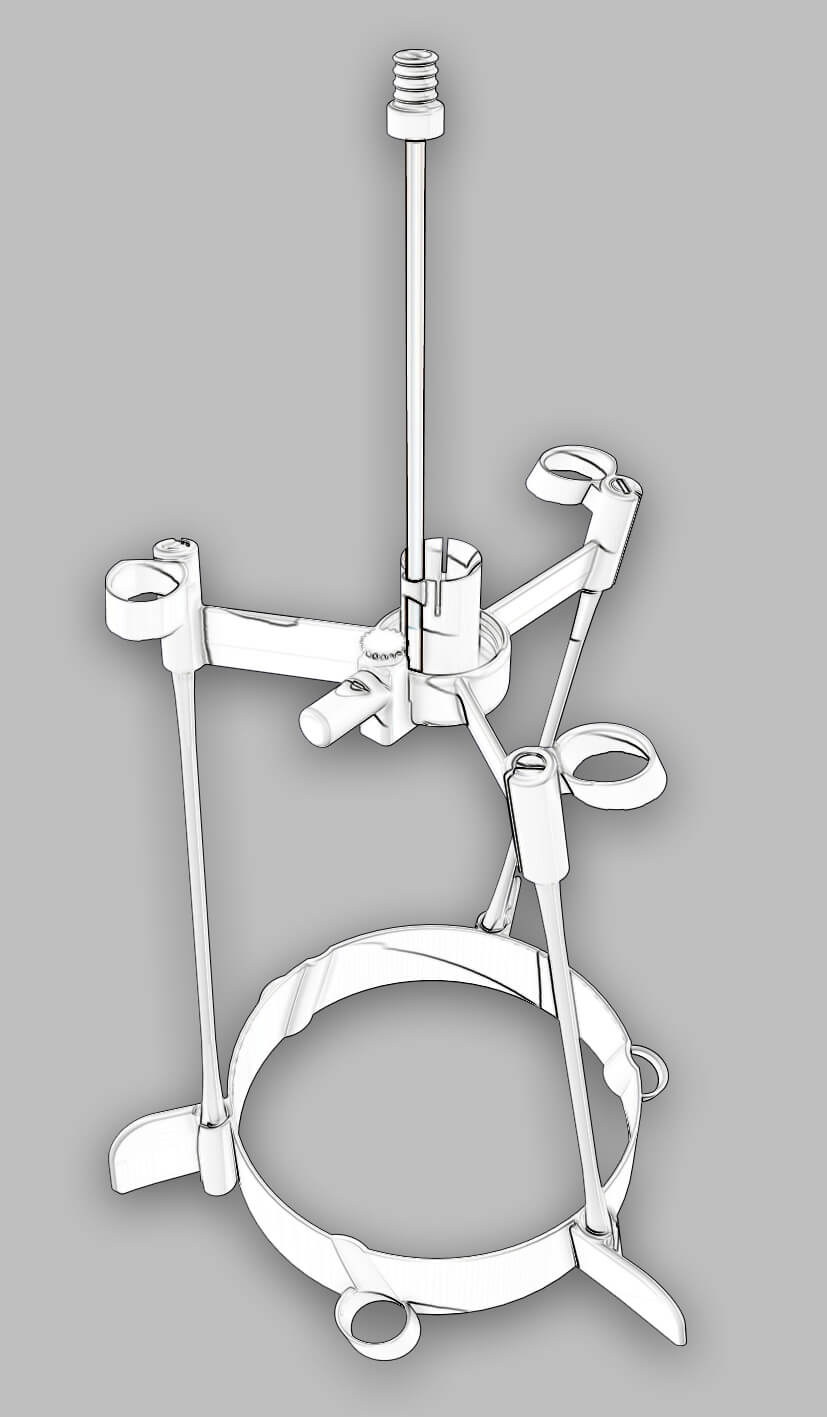
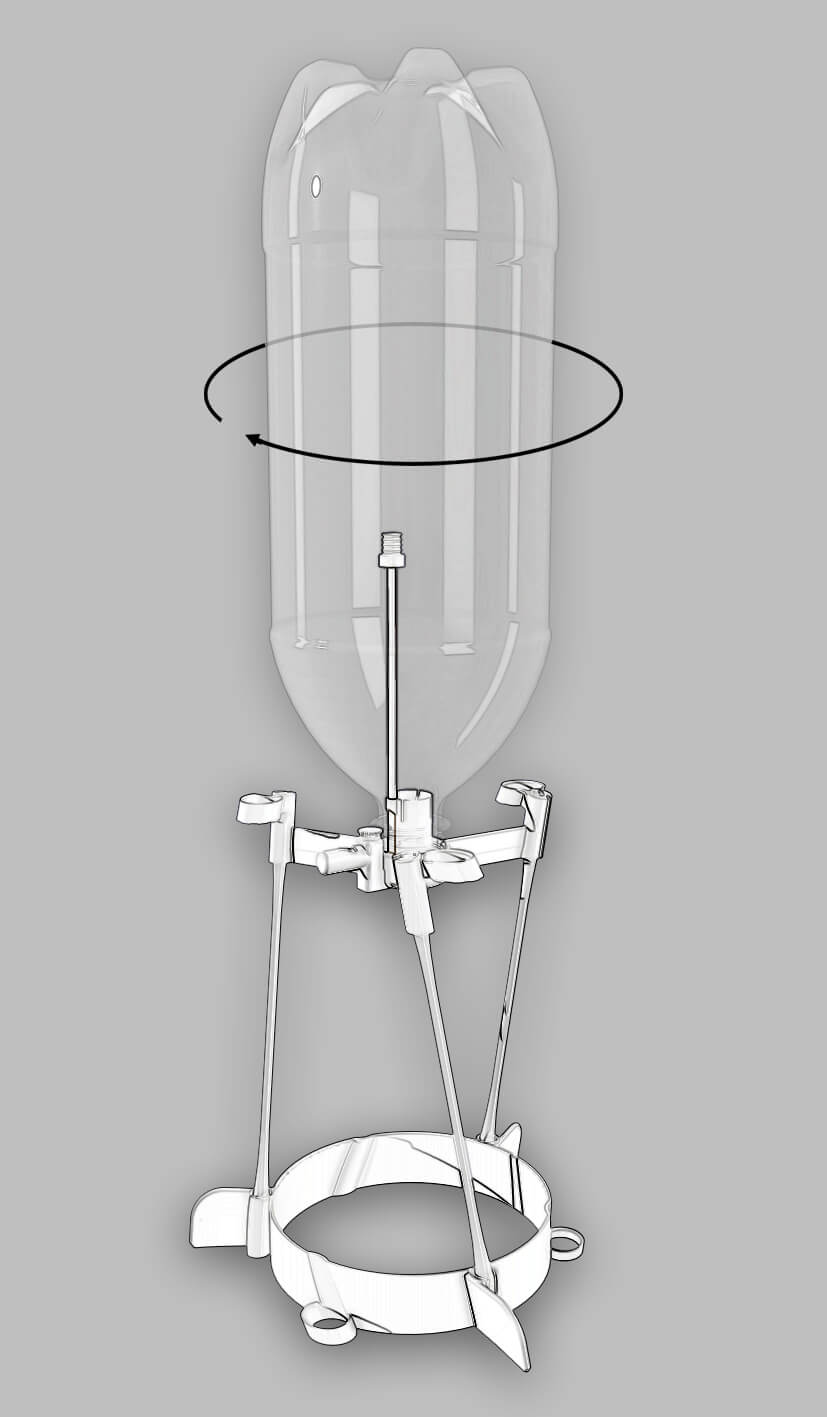
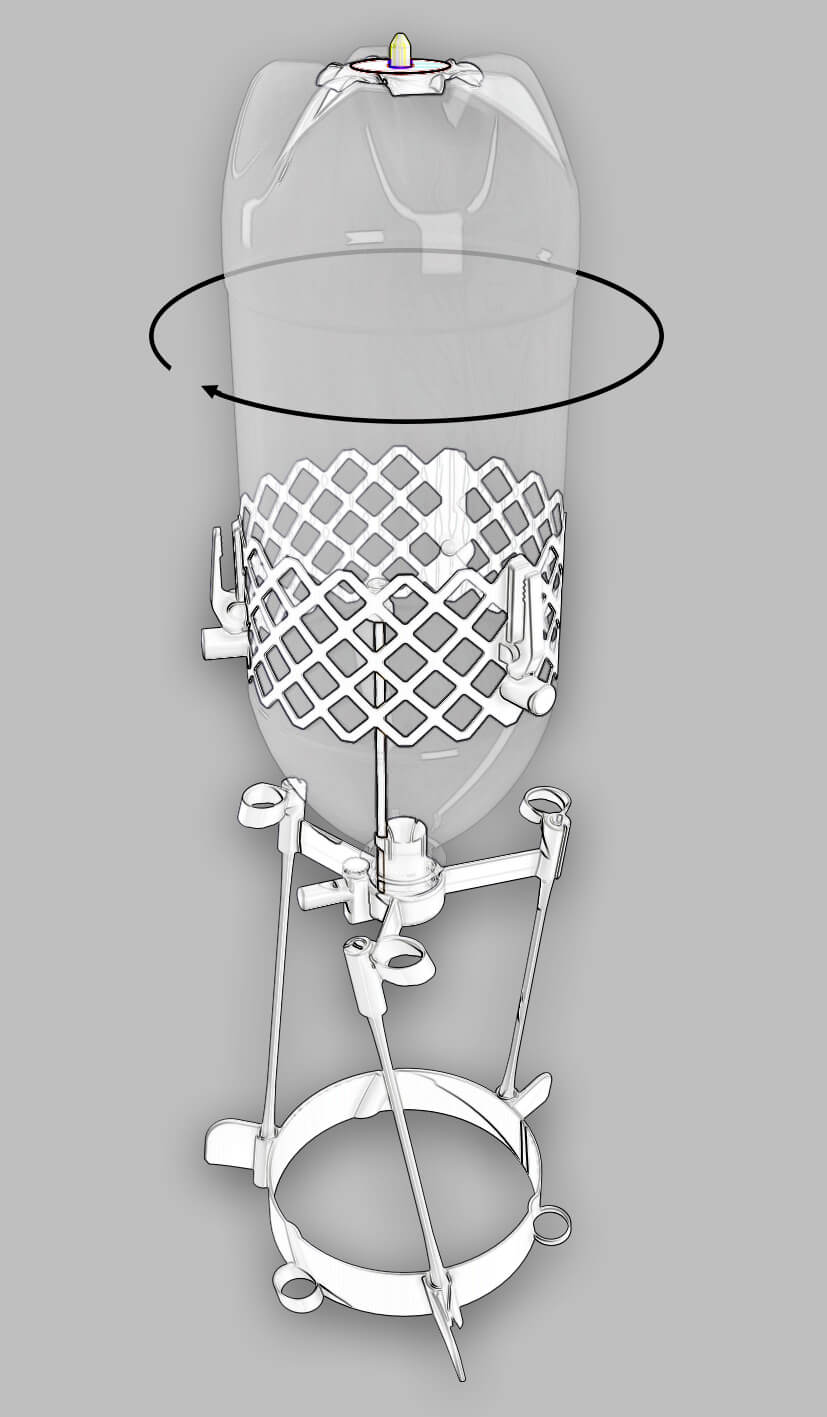
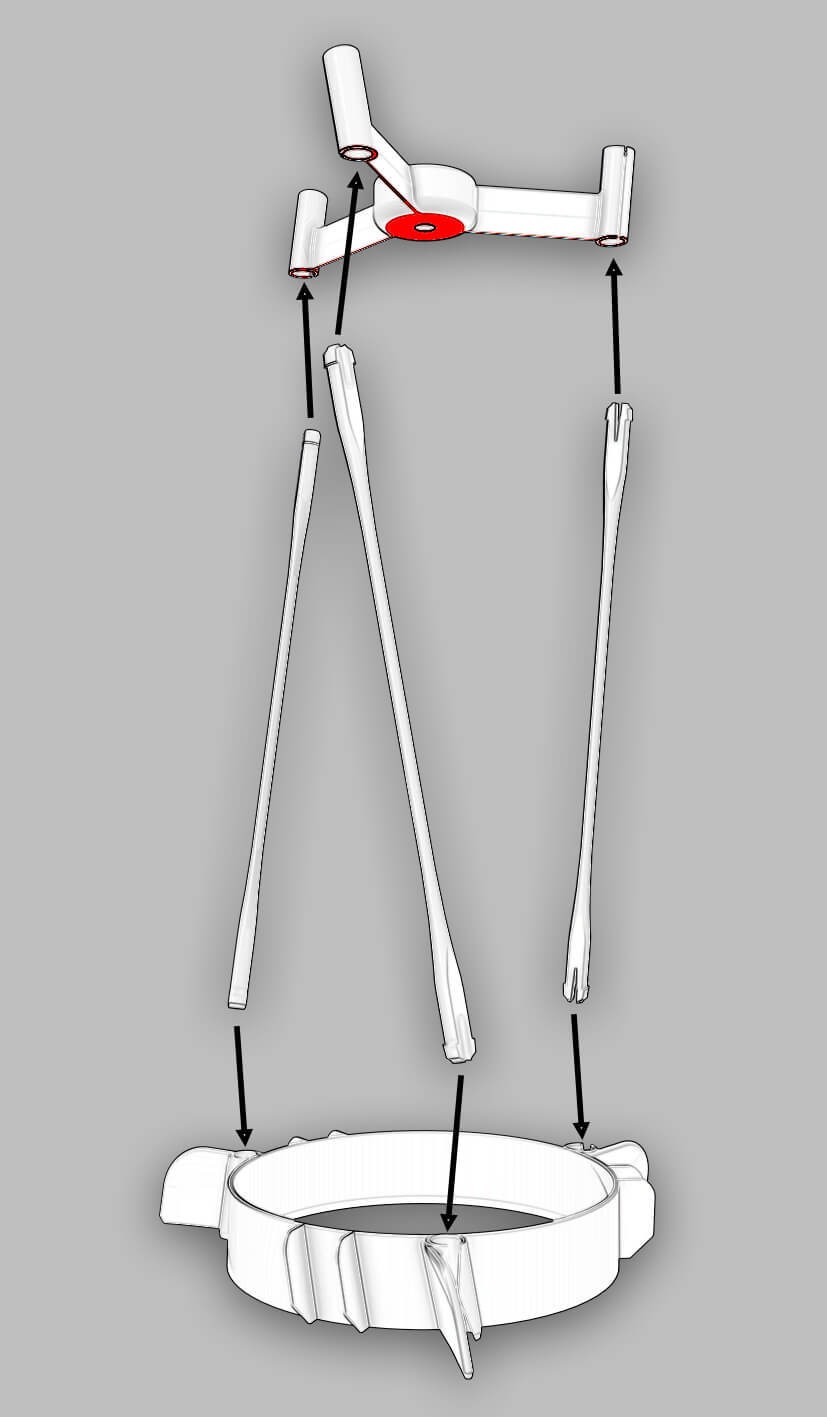
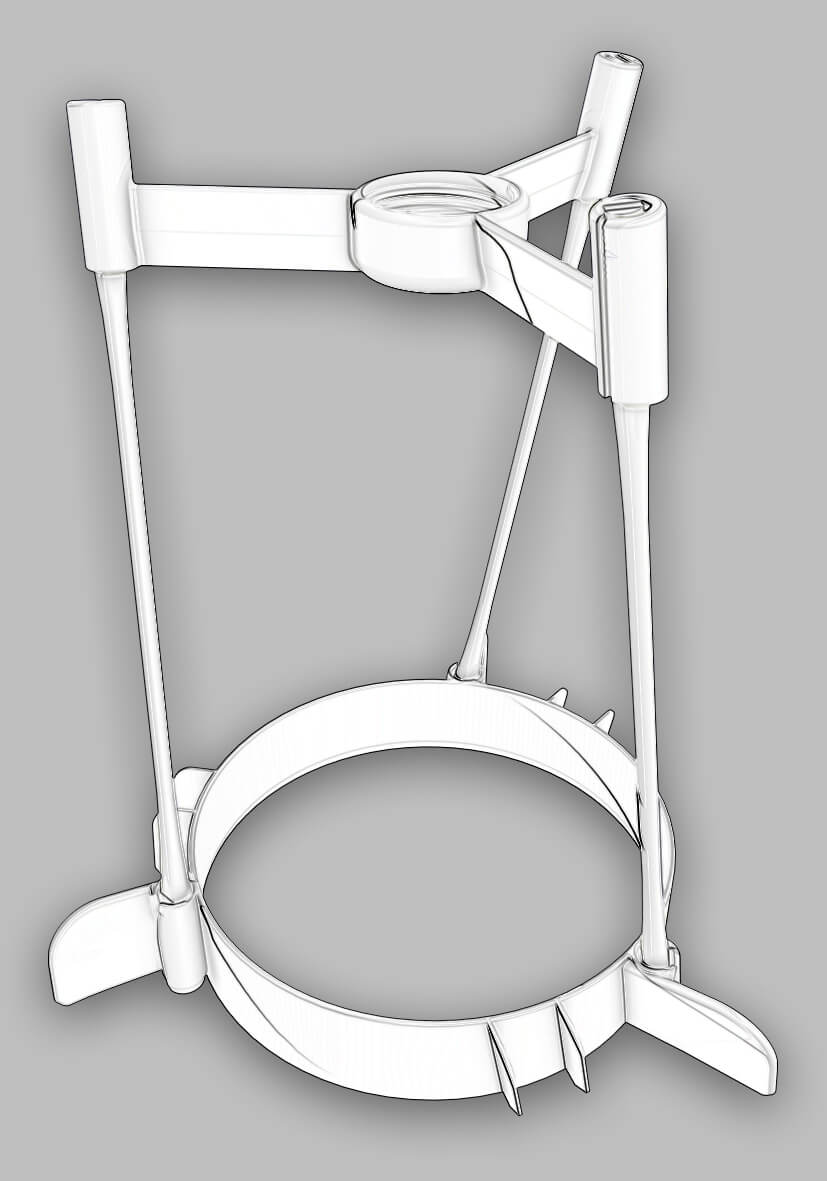
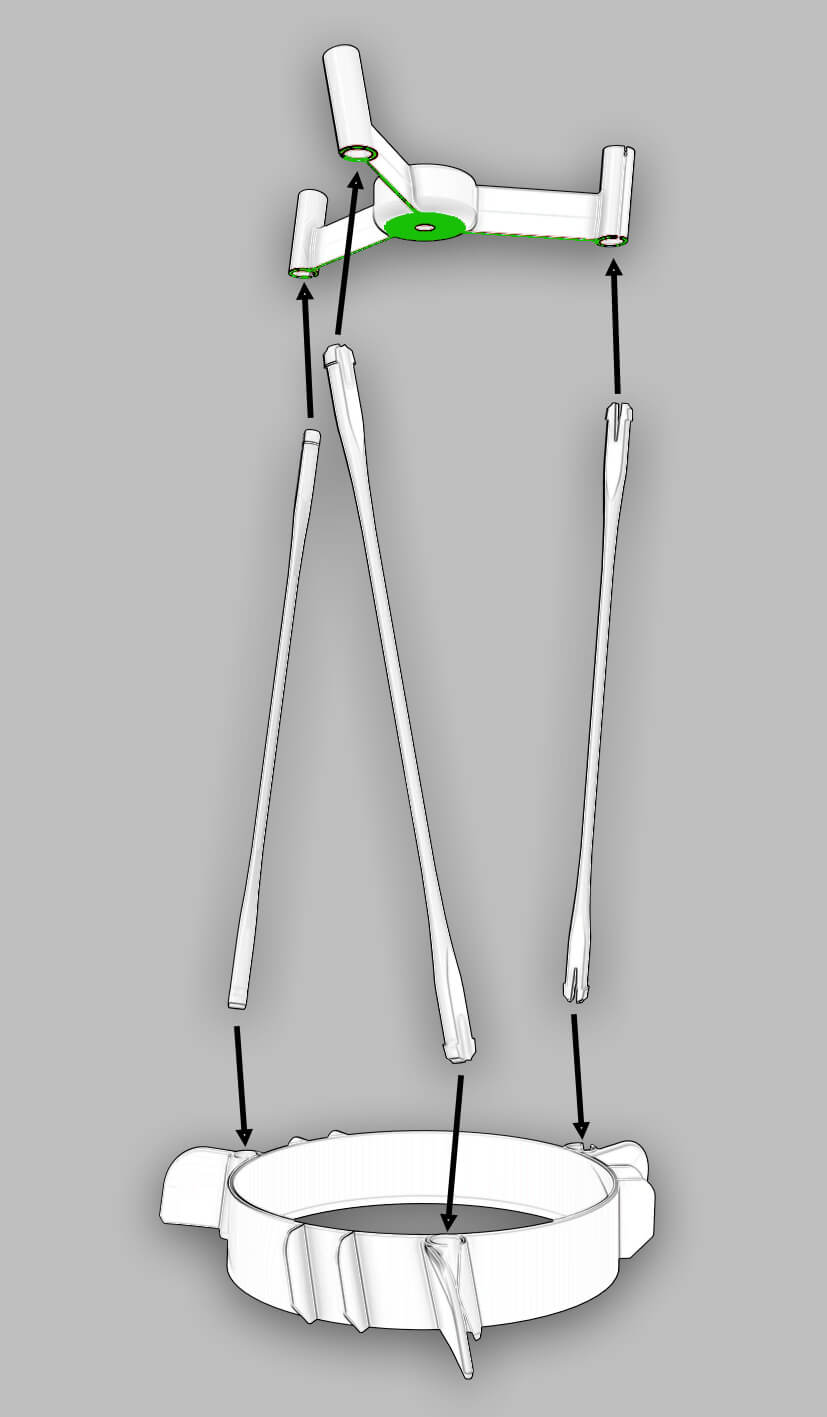
The booster stage is always the first stage of all the rockets: 4, 3, 2 and 1 stage. Locate the ring fin with three small rings in its bottom edge, Then locate the nozzle with three rings on its struts, an pressure relief whistle sticking out the side, and a tube sticking out the top. Insert one of the small rods into each receptacle of the ring fin. Each rod should click into place. Then insert the other end of the small rods into the nozzle/strut receptacles until they click. The rods might bend a little as you are inserting them. You can minimize the bending by pushing each one in halfway, one after the other, until they are all three clicked into place. Don't worry about the flat sides of the rods; the orientation of the flats doesn't matter.
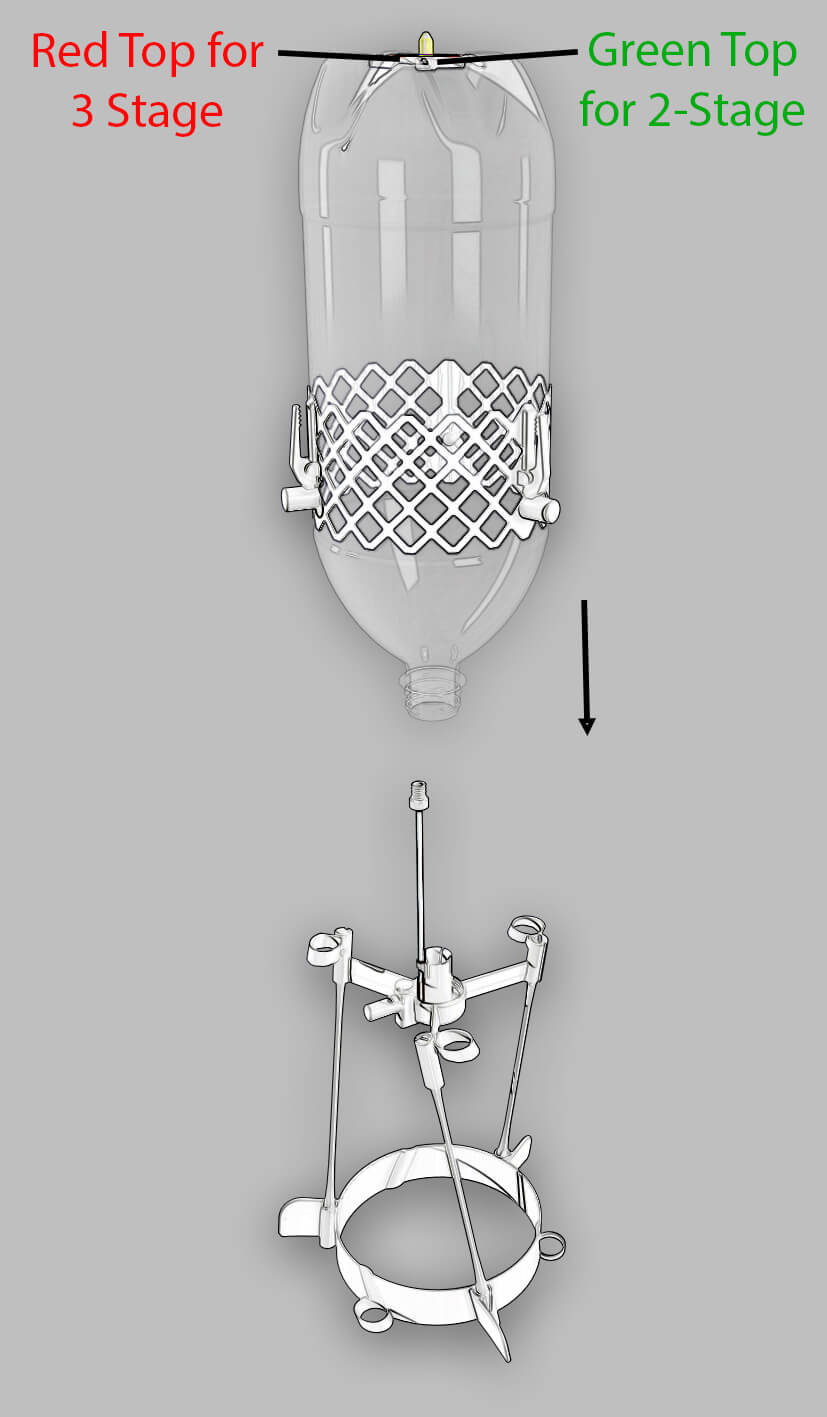
Choosing the Right Bottle for the Booster
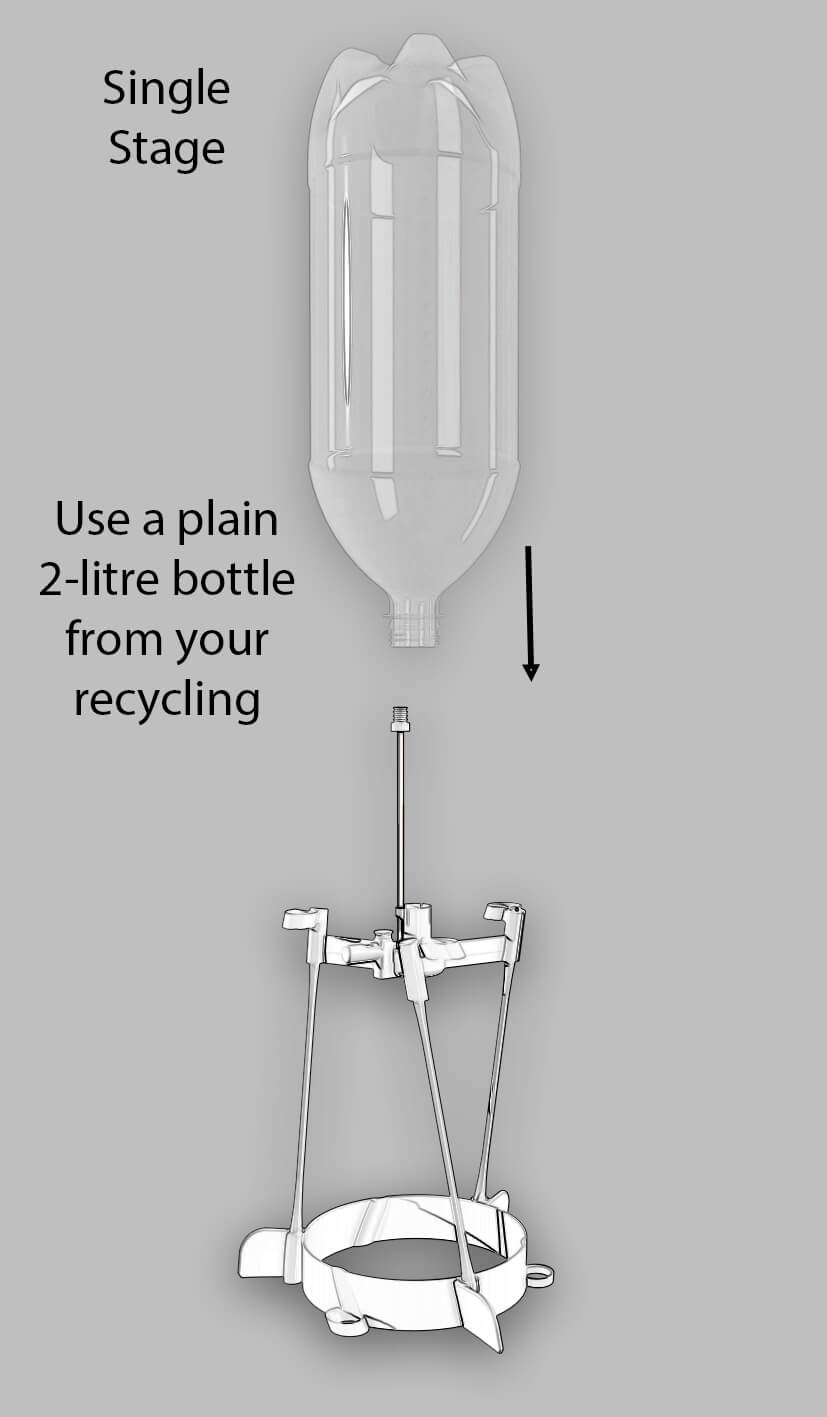
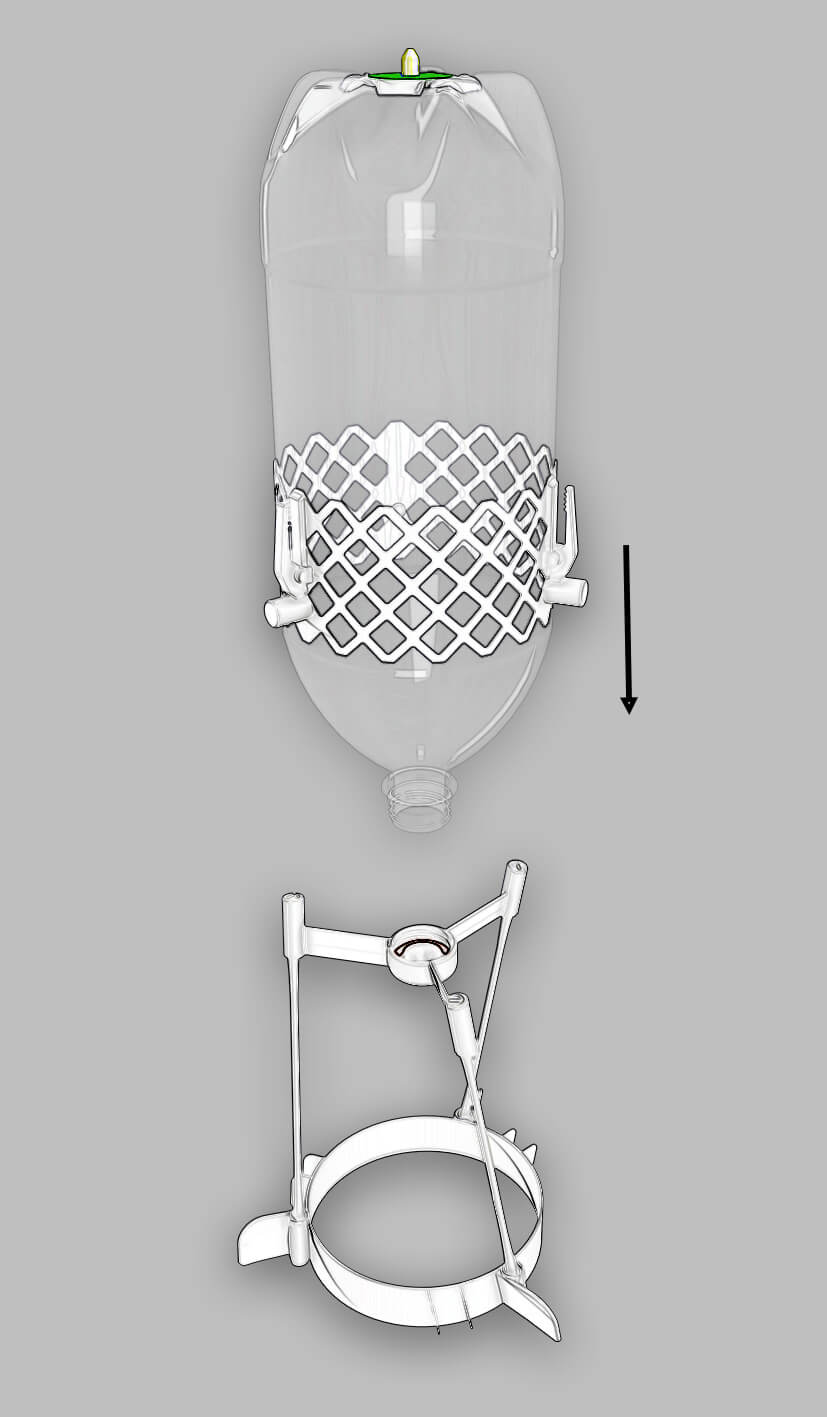
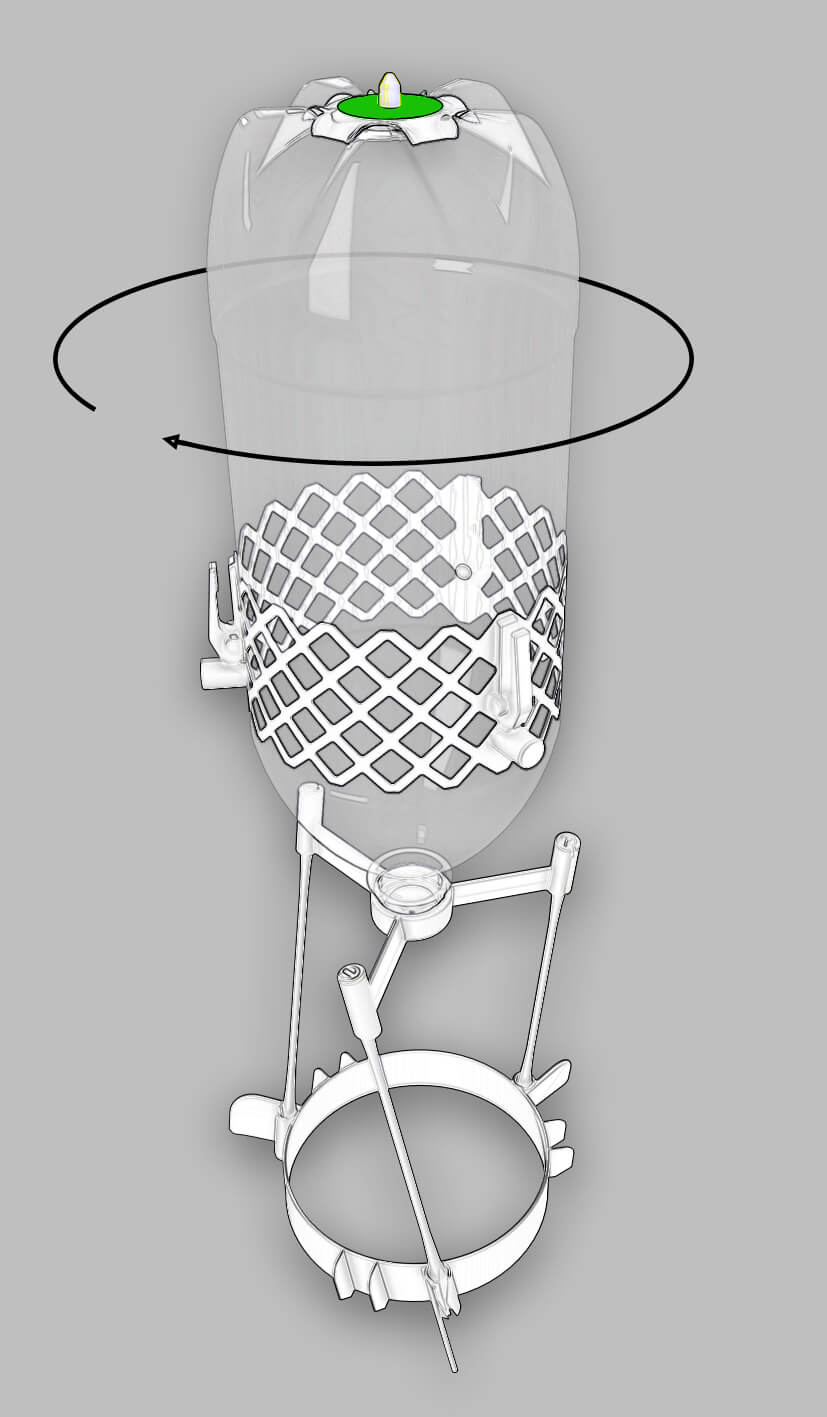
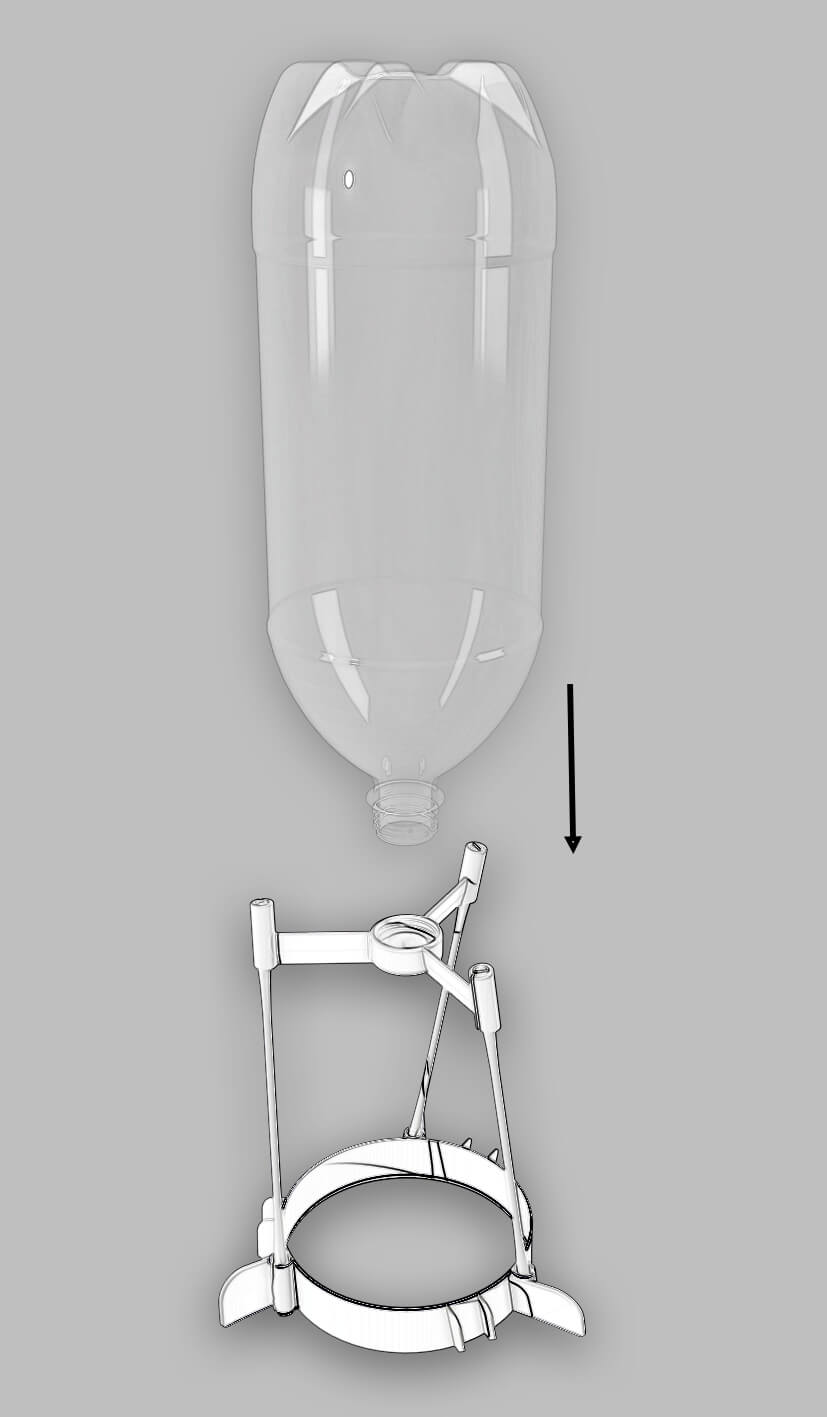
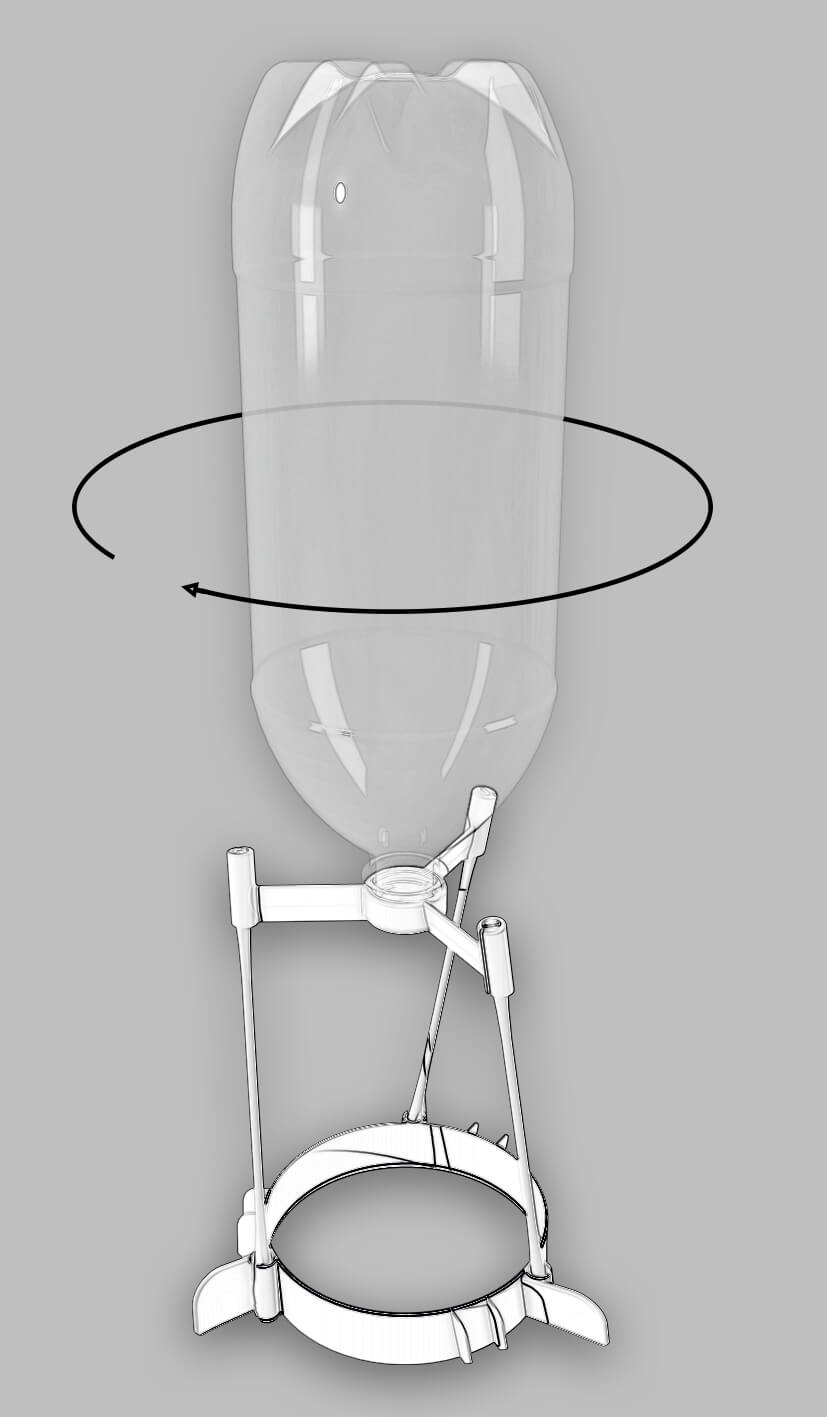
To finish the booster, thread a bottle gently into the nozzle cap (the bottle type will depend on whether you are making a 1-, 2-, 3- or 4-stage rocket, as in the following list). Don't over-tighten. With the 4-stage kit you can also make a 3-, 2- or 1-stage. With the 3-stage kit you can also make a 2- or 1-stage. With a 2-stage kit you can also make a 1-stage.
- For a 1-stage use your own plain 2-litre bottle, then proceed to Launching the Rocket,
- For a 2-stage, use the supplied bottle with the green top and continue with Assembling the Top Stage.
- For a 3- or 4-stage, use the supplied bottle with the red top and continue with Assembling the Mid Stage.
Assembling the Mid Stage
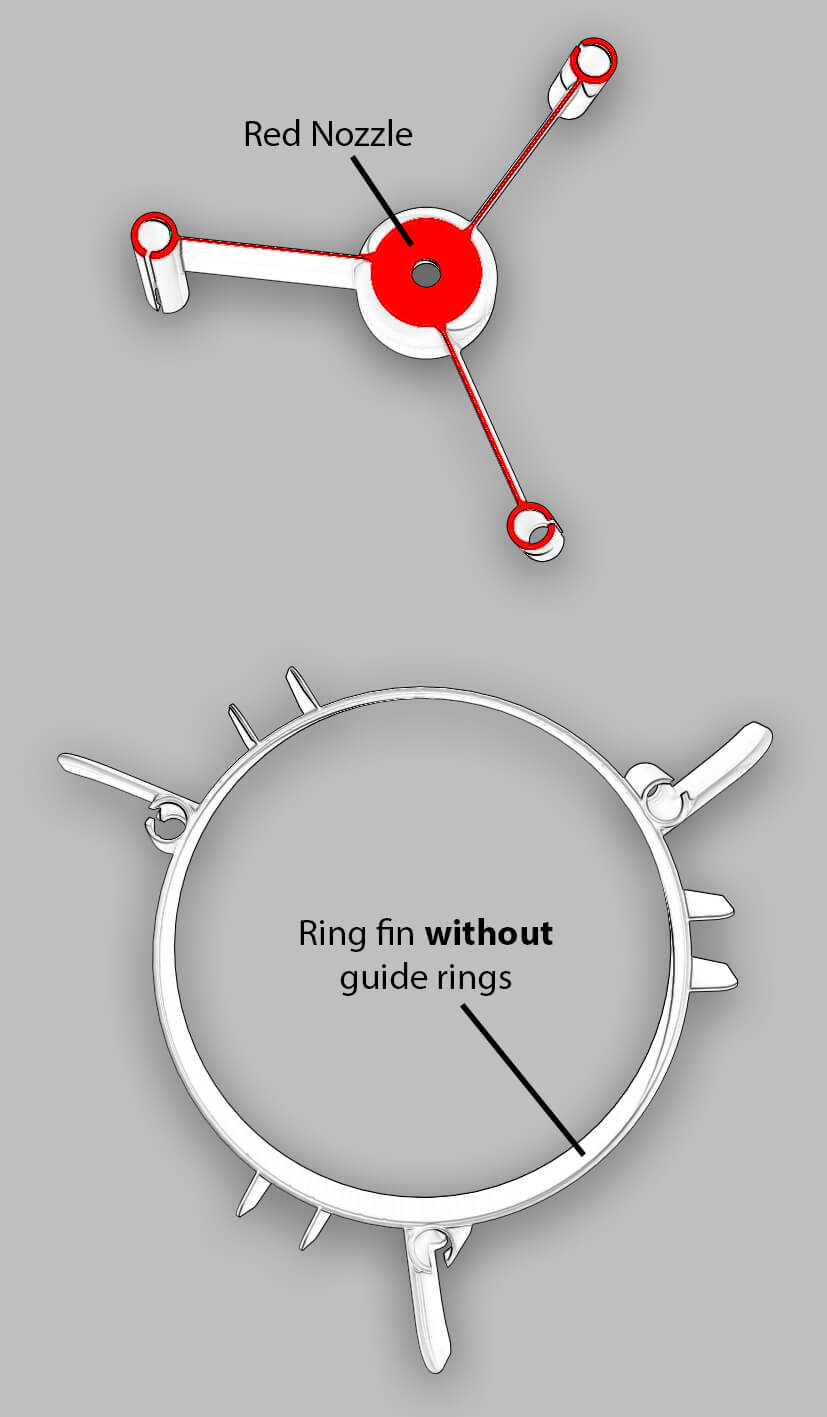
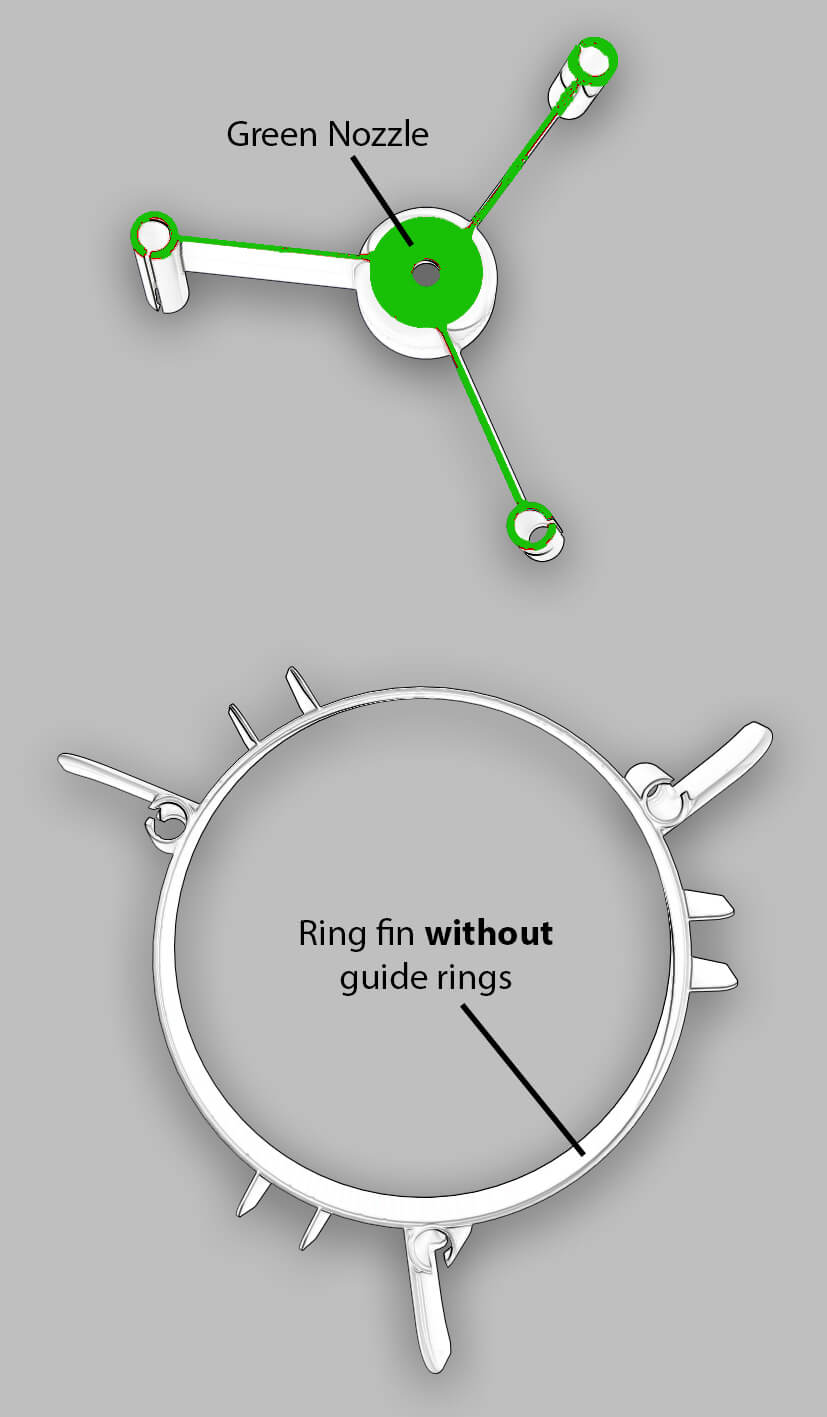
Only the 3- or 4-Stage rockets require this step. Locate a ring fin without guide rings, Then locate the RED nozzle . Insert one of the small rods into each receptacle of the ring fin. The rod should click into place. Then insert the other end of the small rods into the nozzle/strut receptacles until they click.
Connecting the Mid-Stage Bottle
Thread the bottle with the GREEN top gently into the nozzle cap. Don't over-tighten. Now the Mid Stage is done. Note that the 4-stage rocket has two of these mid stages.
Assembling the Top Stage
This is for 2-, 3- and 4-Stage rockets. Locate a ring fin without guide rings, Then locate the GREEN nozzle . Insert one of the small rods into each receptacle of the ring fin. The rod should click into place. Then insert the other end of the small rods into the nozzle/strut receptacles until they click.
Connecting the Top-Stage Bottle
Thread a plain 2-litre plastic fizzy pop bottle gently into the nozzle cap. Don't over-tighten. Now the Top Stage is done. The top stage of the multi-stage rockets always use a green nozzle.
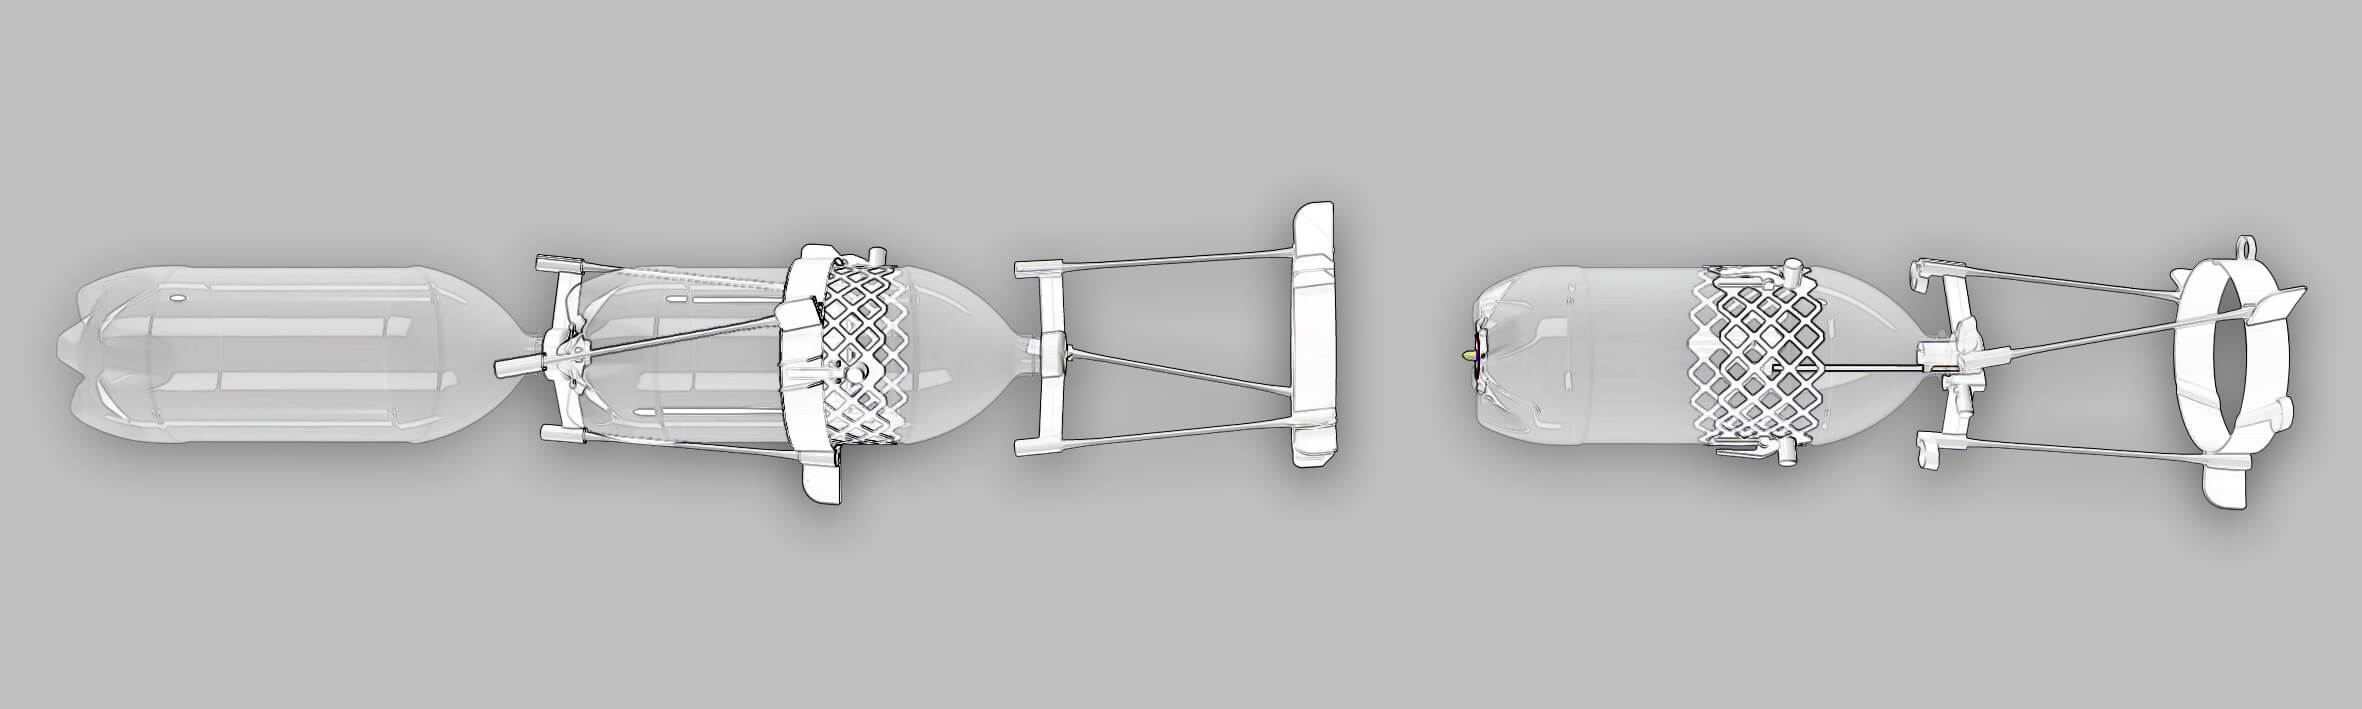
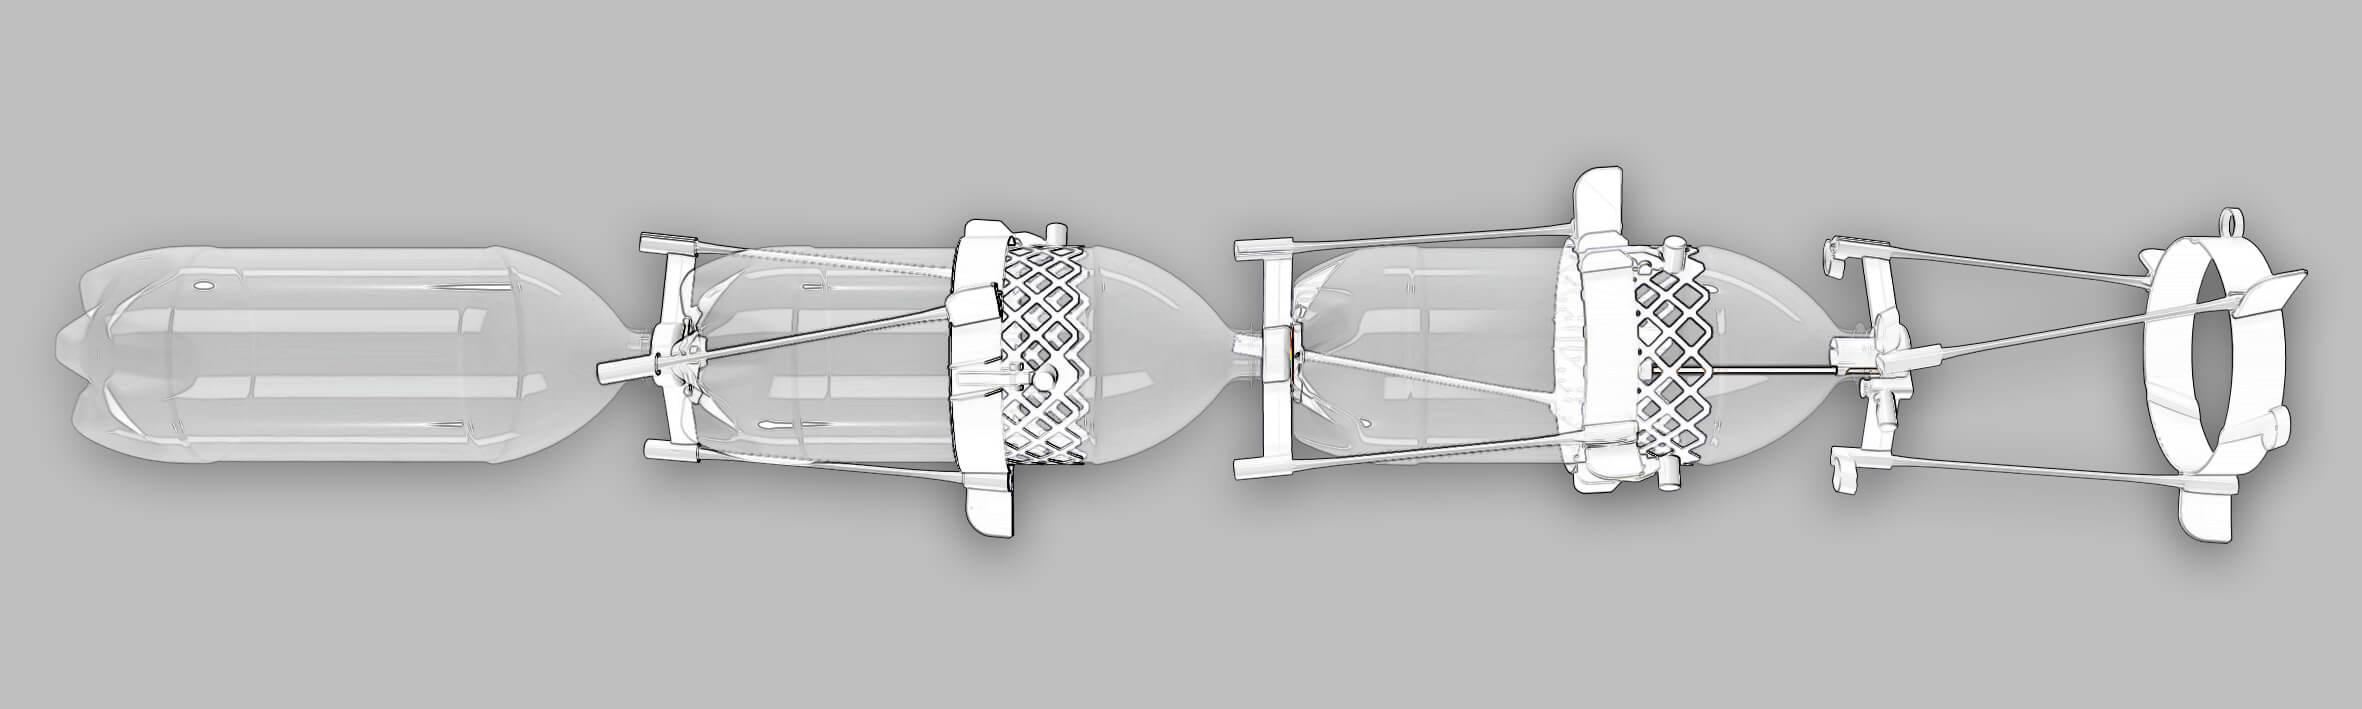
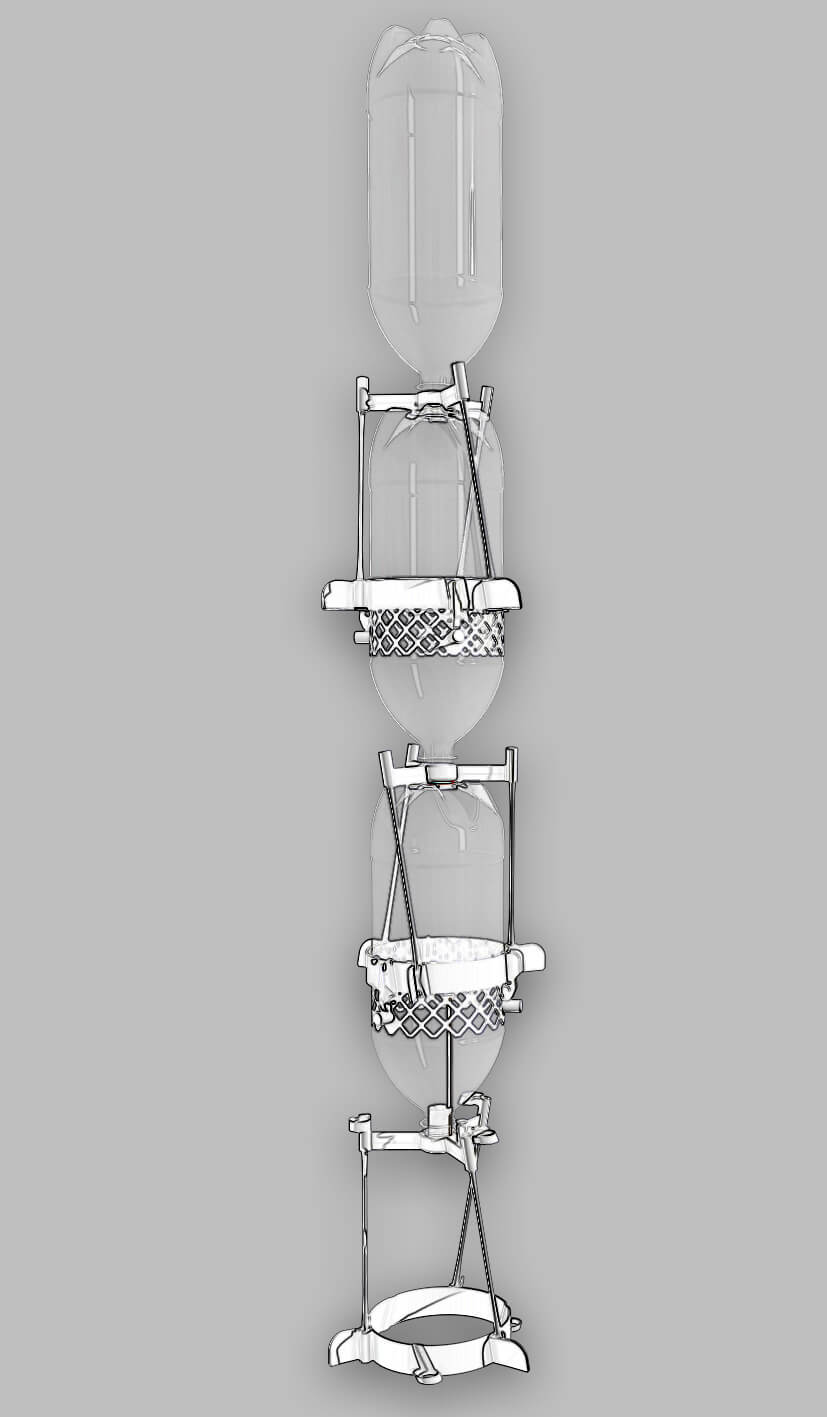
Connecting the Stages
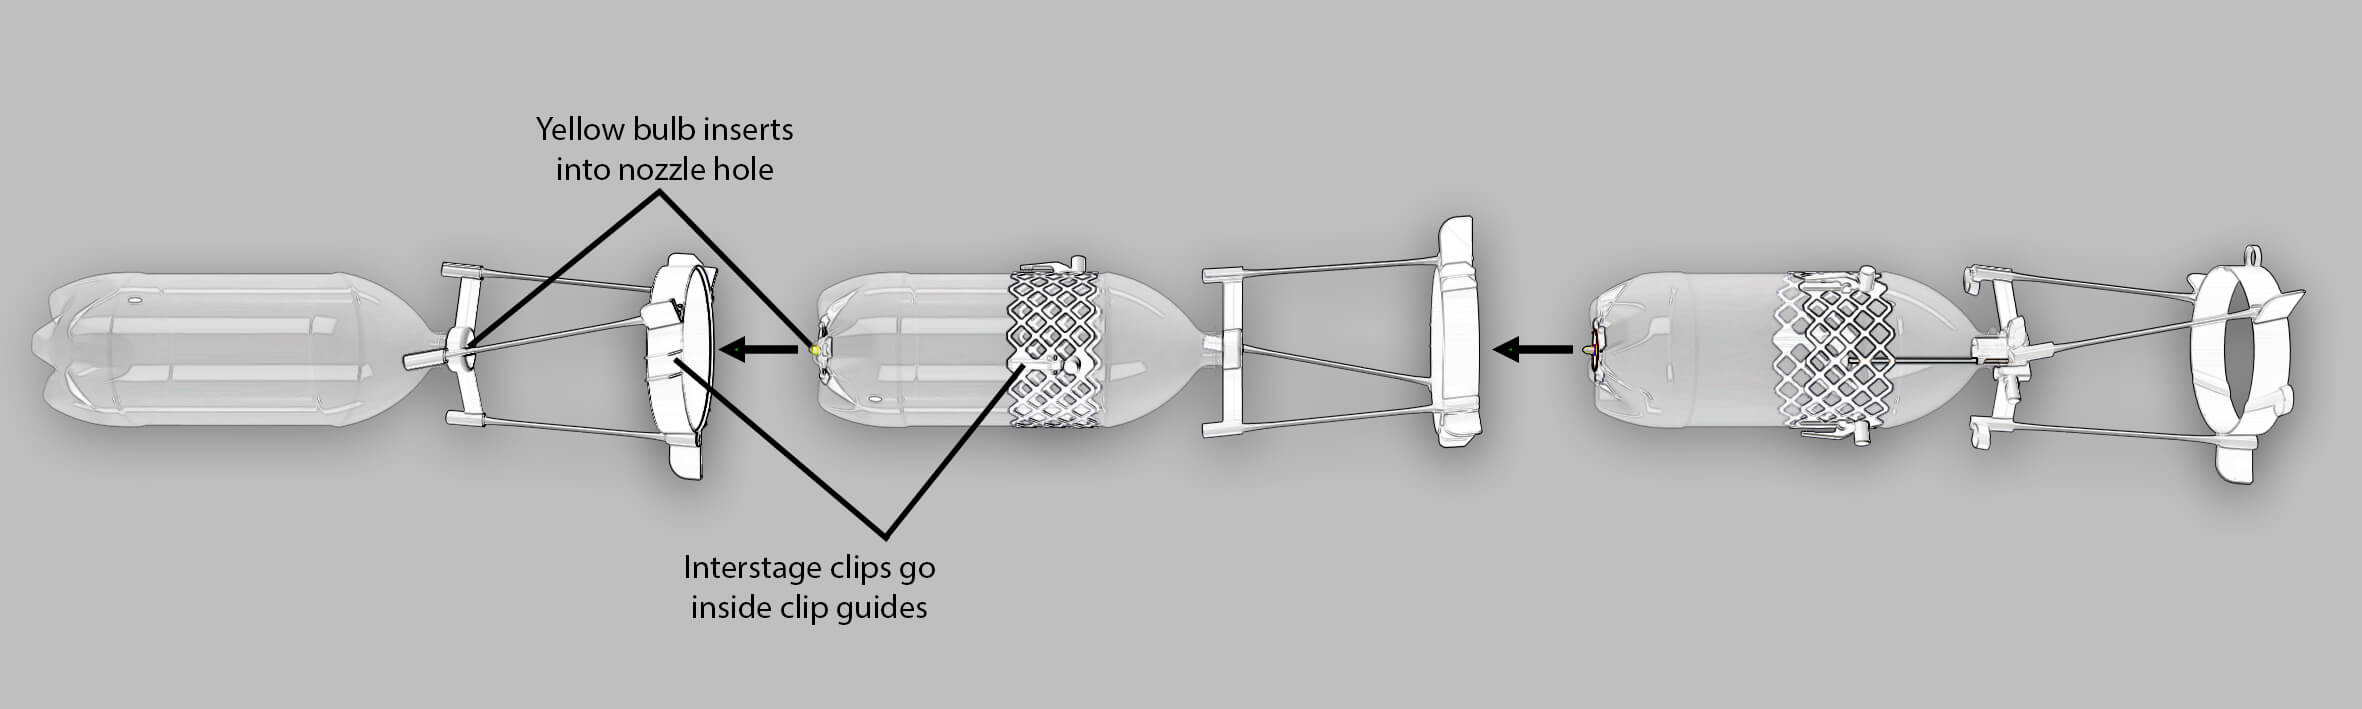
This works for the 2-, 3- and 4-Stage rockets. First put the top of the booster stage into the ring fin of the next stage. Notice that the red top of a stage goes into the red nozzle of the next stage; the green top of a stage goes into the green nozzle of the next stage. The yellow bulb at the top of a stage inserts into the nozzle of the next stage. At the same time, the three clips of the interstage belt must be aligned within the clip guides (there's a soft pad in there so the clip can hold on to the next stage). If you have difficulty inserting the yellow bulb into the next stage, first make sure that the colours match: green stage top goes into green nozzle, red stage top goes into red nozzle. If correct, dab some water or Vaseline on each yellow bulb to help it slip in. Don't ever get any Vaseline or lubricants on the large launcher bulb.